Grasshopper API odkaz – parametrická optimalizace svaru přípoje (03) verze 24
Grasshopper - Instalace pluginu
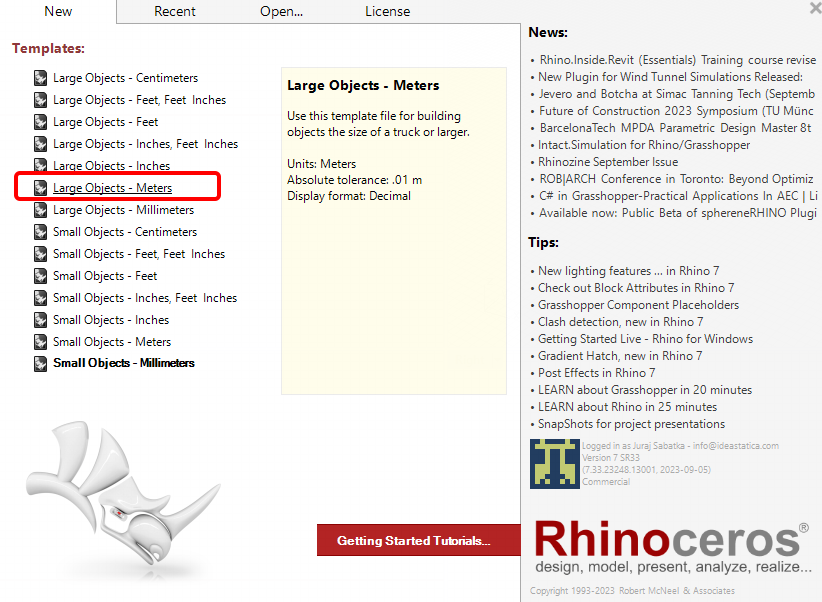
Zkušební verzi programů Rhino3d a Grasshopper můžete získat na webových stránkách Rhino3d. Spusťte program RhinoCeros a vyberte šablonu s velikostí měřítka v Metrech:
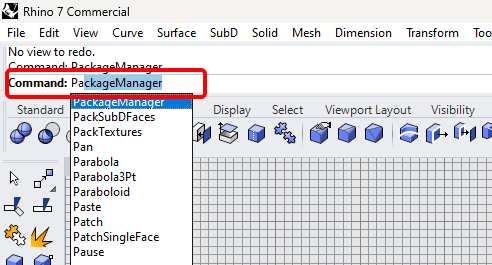
Do příkazového řádku zadejte "Package Manager":
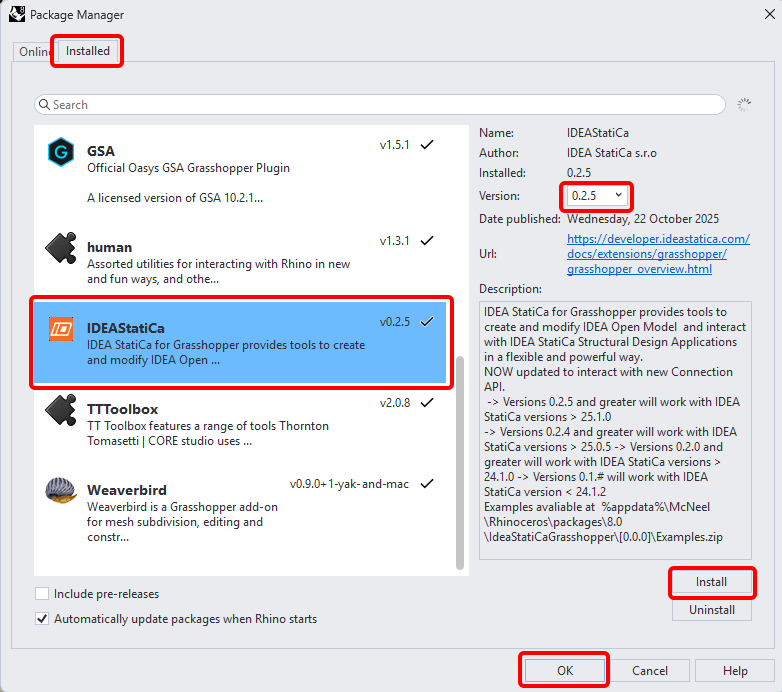
Zobrazí se nové okno; vyberte IDEAStatiCa a klikněte na tlačítko Install. Zásuvný modul se stáhne a nainstaluje. Aby se stal aktivním, je nutné restartovat systém Rhinoceros.
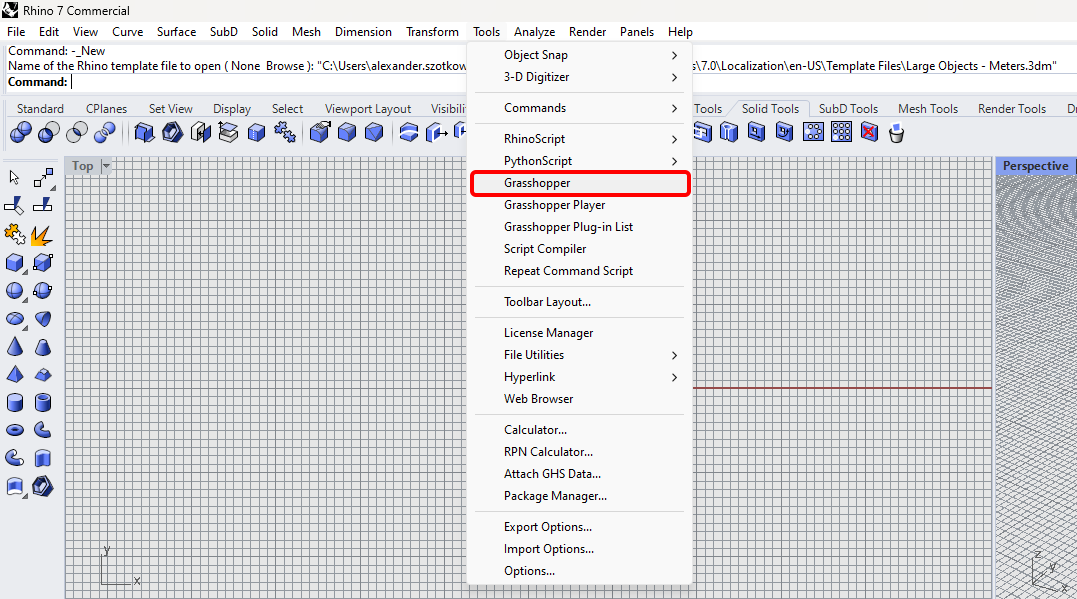
Chcete-li spustit program Grasshopper se zásuvným modulem IDEA StatiCa, vyberte na kartě Rhihoceros položku Tools / Grasshopper.
Jak vidíte, zásuvný modul je již začleněn.

Informace o komponentách a příkazech modulu IDEA StatiCa pro Grasshopper najdete v článku Popis komponent modulu Grasshopper.
Plugin Anemone
Protože Grasshopper neumí pracovat se smyčkami, je nutné nainstalovat další plugin, který to umožňuje. V tomto příkladu použijeme Anemone, který umožňuje vytvářet smyčky v Grasshopperu.

Poznámka: umístěte soubor .gha do knihoven Grasshopperu, klikněte pravým tlačítkem na vlastnosti, zaškrtněte políčko „odblokovat", stiskněte použít, zavřete vše a restartujte Rhino.
IDEA StatiCa Connection – Návrh styčníku a nastavení parametrů
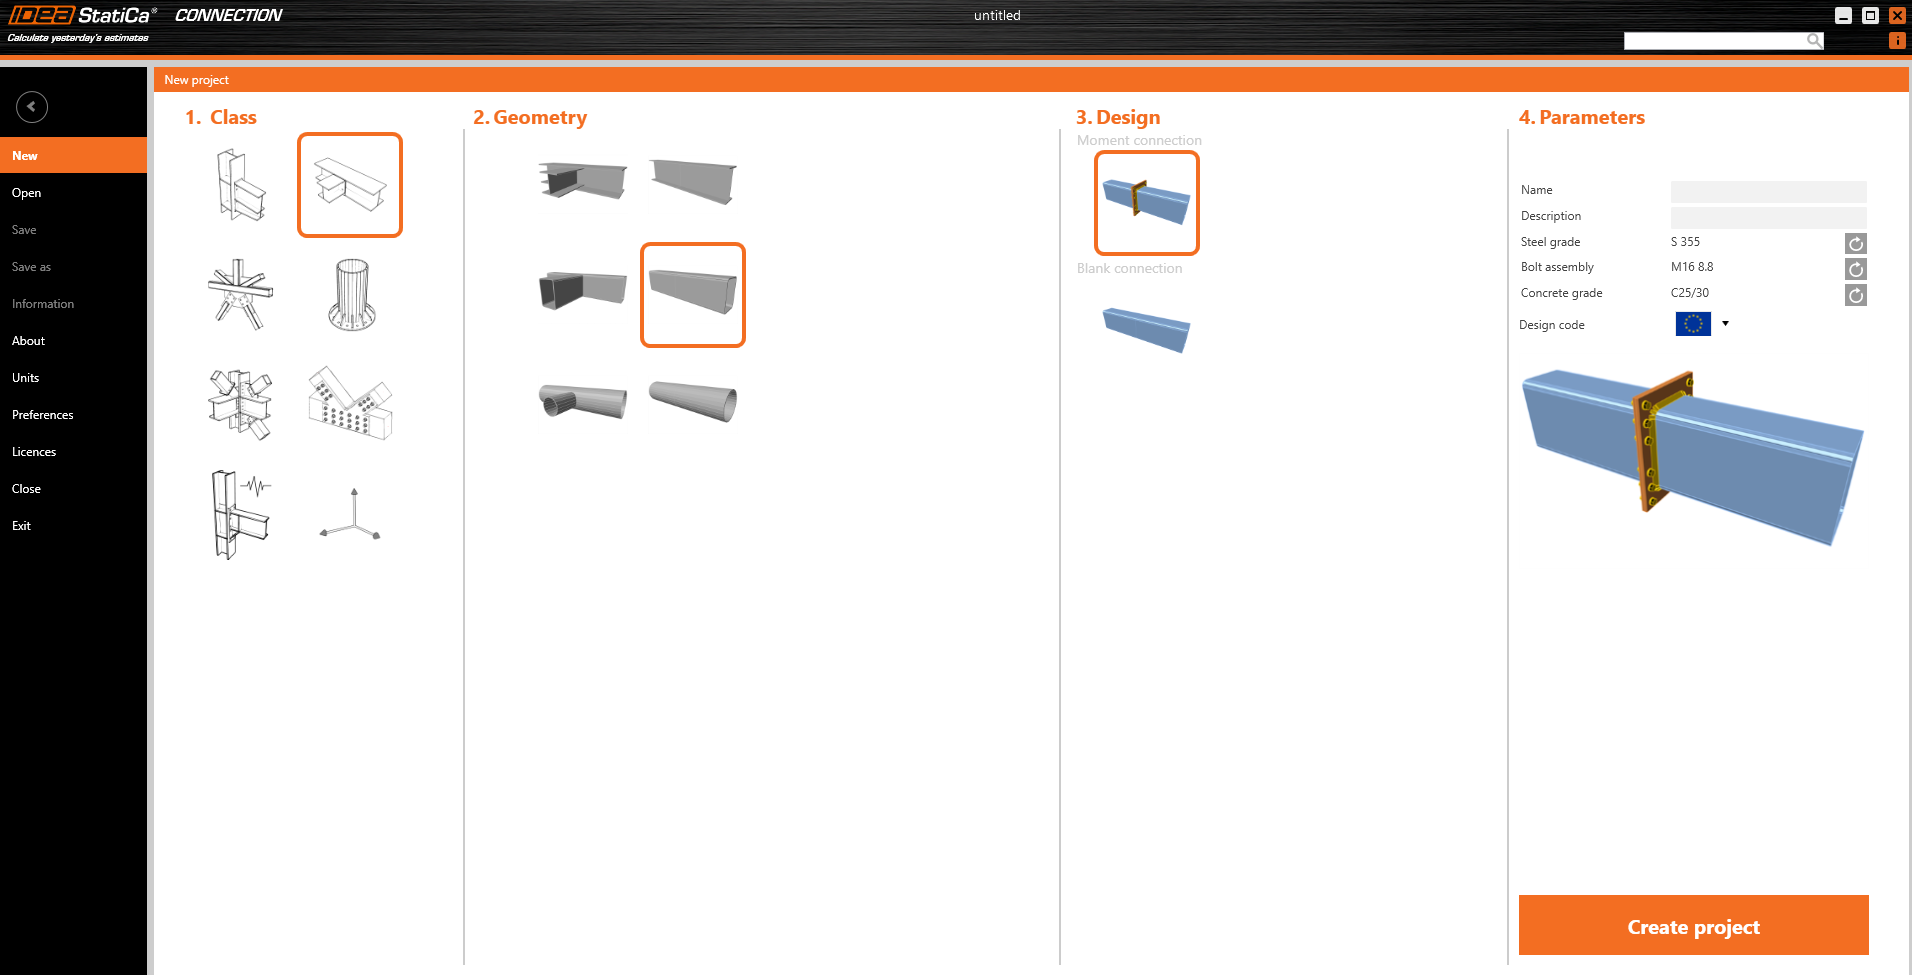
Pro tento příklad vytvoříte jednoduchý momentový přípoj pomocí šablony:
Aby bylo možné pracovat s parametry, je nutné povolit kartu Vývojář v Předvolby / Rozšířená nastavení:

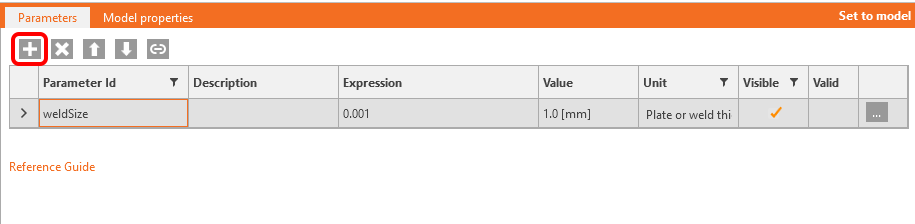
Nyní je třeba nastavit parametr pro svary. Klikněte na tlačítko plus na kartě Vývojář a změňte text podle obrázku:
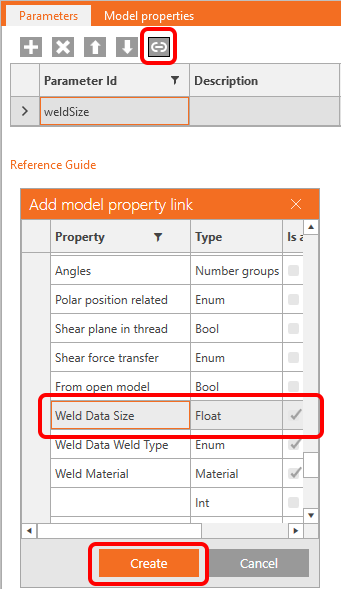
Chcete-li tento parametr propojit s příslušnými svary, klikněte na tlačítko odkaz a vyberte pole vlastnosti, jak je znázorněno na následujícím obrázku:
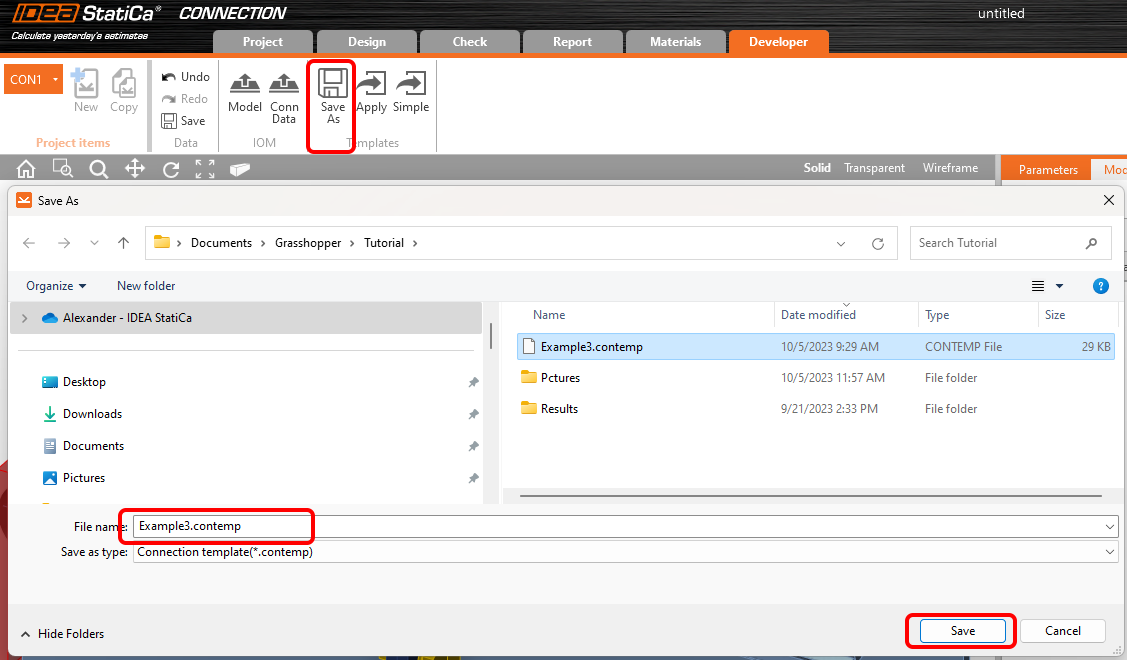
Nyní můžete uložit tento styčník s operací a parametrem do šablony pojmenované Example3.contemp pomocí tlačítka Uložit jako.
Zavřete soubor a otevřete nový soubor, tentokrát bez jakýchkoli operací šablony:

Přejděte na Účinky zatížení a změňte zatížení podle následujícího obrázku:
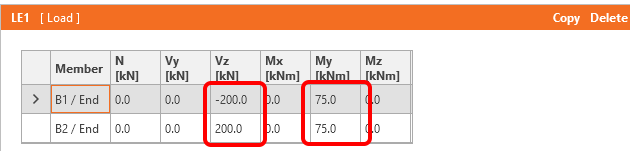
Nyní uložte tento soubor pod názvem Example3.ideaCon.
Grasshopper – Sloučení souborů *ideaCon a *contemp, určení tloušťky svaru.
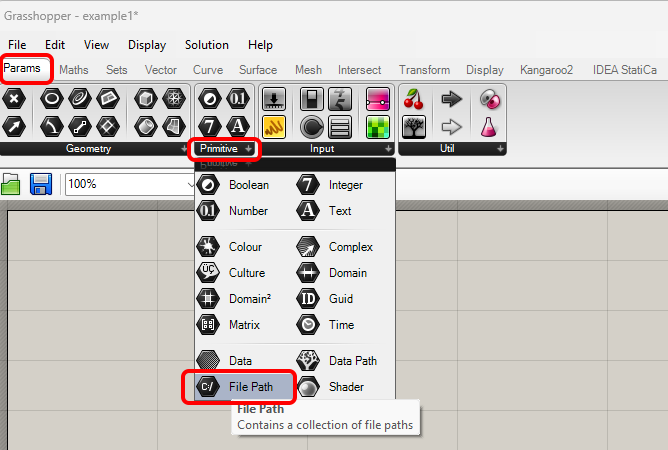
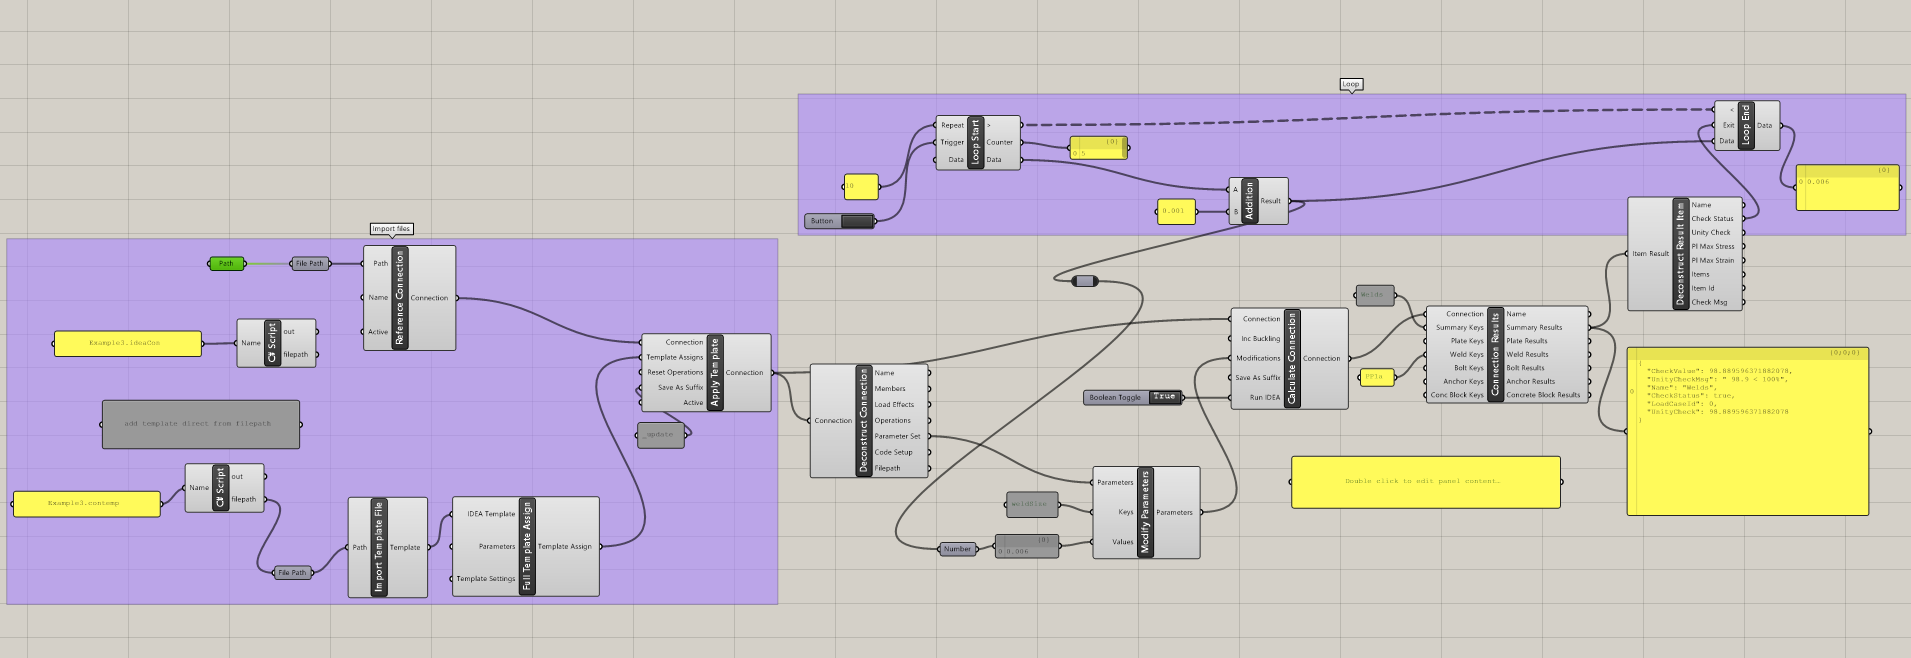
Vytvořte nový dokument a přidejte následující komponenty pro sloučení souborů *.ideaCon a *.contempt. Na horním pásu karet vyberte kartu Params a umístěte komponentu File Path na plátno.
Klikněte pravým tlačítkem na komponentu a vyberte soubor Example3.ideaCon, který jsme uložili dříve.
Poznámka: Pokud otevřete přiložený soubor, musíte tuto cestu odpovídajícím způsobem změnit.
Nebo můžete použít komponenty Params / Panel a Maths / C# Script pro import souborů Example3.contemp a Example3.ideaCon.
Nyní připojte následující komponenty na plátno, jak je znázorněno na obrázku.
Import souboru:
IDEA StatiCa / Connection / Reference Connection
IDEA StatiCa / Connection / Import Template file
IDEA StatiCa / Connection / Full Template Assign
IDEA StatiCa / Connection / Apply Template (pro vytvoření výsledného souboru Example3_update.ideaCon)
Výpočet a výsledky:
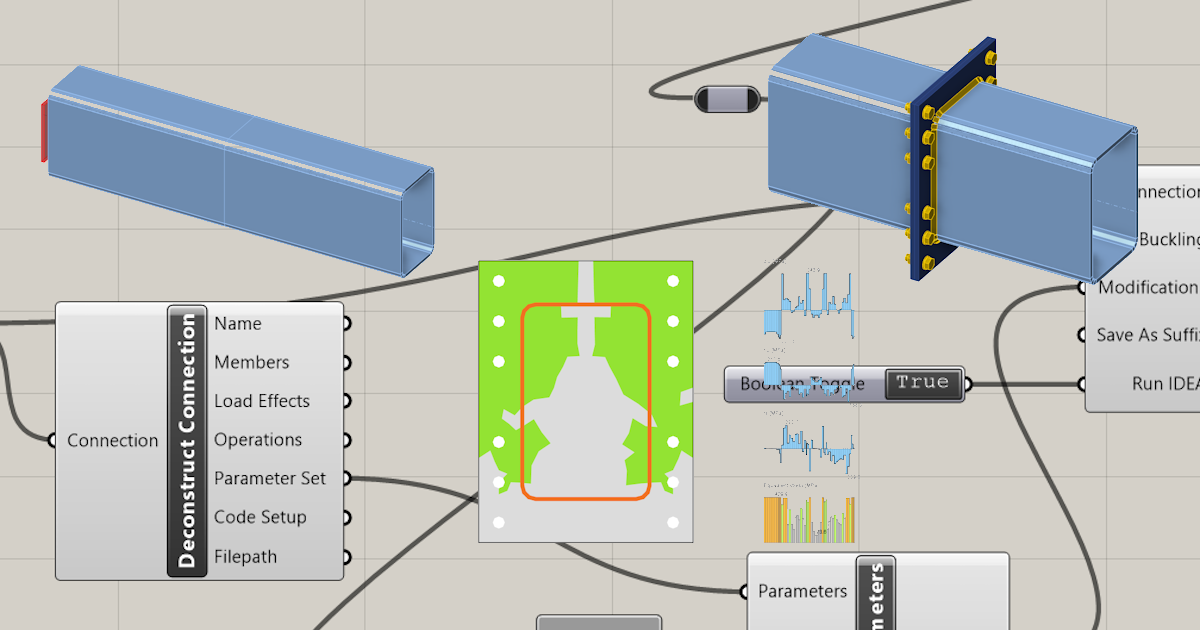
IDEA StatiCa / Connection / Deconstruct Connection
IDEA StatiCa / Connection / Modify Parameters
IDEA StatiCa / Connection / Calculate Connection
IDEA StatiCa / Connection / Connection Results
IDEA StatiCa / Connection / Deconstruct Result Items
Komponenty Anemone pro iteraci rozměru svaru:
Anemone / Class / Loop Start
Anemone / Class / Loop End
Params / Maths / Operators / Addition
Pro spuštění iterace použijeme komponentu Params / Input / Button.
Iterace proběhne desetkrát od 0,001 m s krokem 1 mm, dokud hodnota CheckStatus nepřejde na True.
Interpretace výsledků
Pro tento konkrétní přípoj dosáhnete uspokojivých výsledků při použití
- Tloušťka svaru 6 mm
Složitější příklady naleznete na svém PC v adresáři
"%appdata%\McNeel\Rhinoceros\packages\7.0\IDEAStatiCa\0.1.1\Examples.zip"
Přiložené soubory ke stažení
- Example3.zip (ZIP, 65 kB)