
Proiectare structurală utilizând Connection Library (EN)
1 Proiect nou
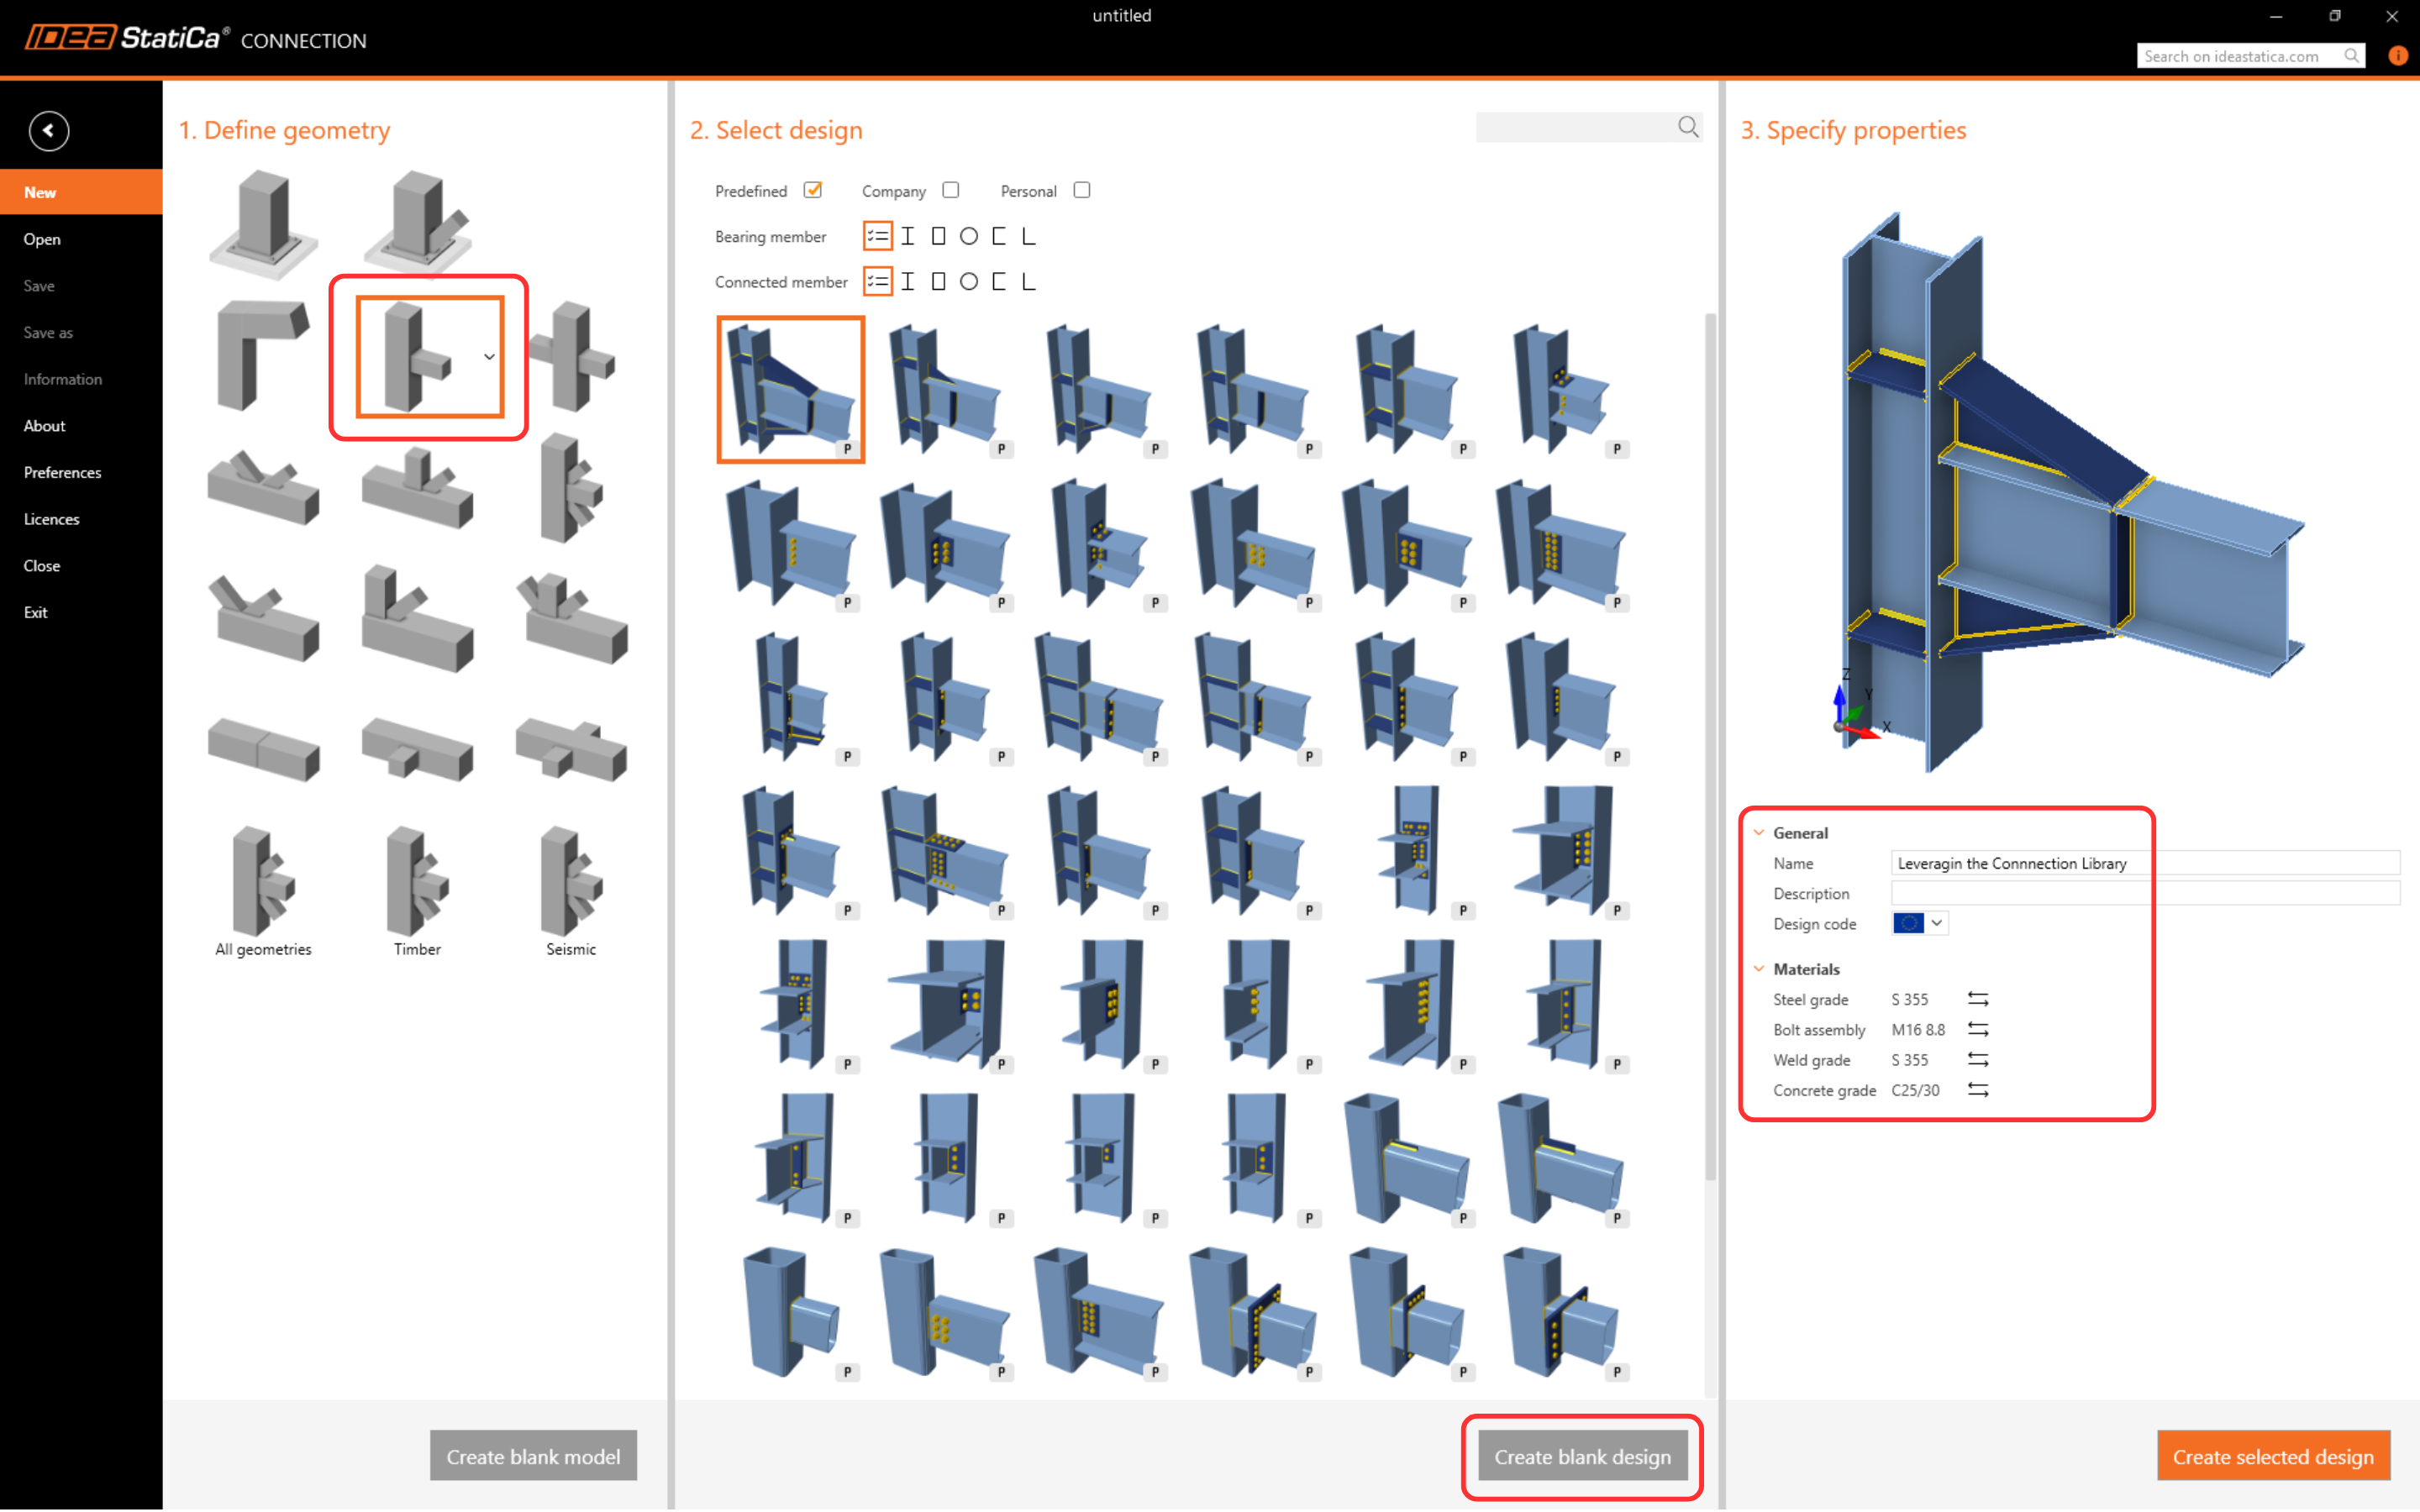
Să lansăm IDEA StatiCa și să selectăm aplicația Connection (descărcați cea mai nouă versiune). Creați un nou proiect gol selectând geometria dorită. Completați numele și alegeți codul de proiectare și proprietățile implicite ale materialului.
2 Crearea unui nou șablon
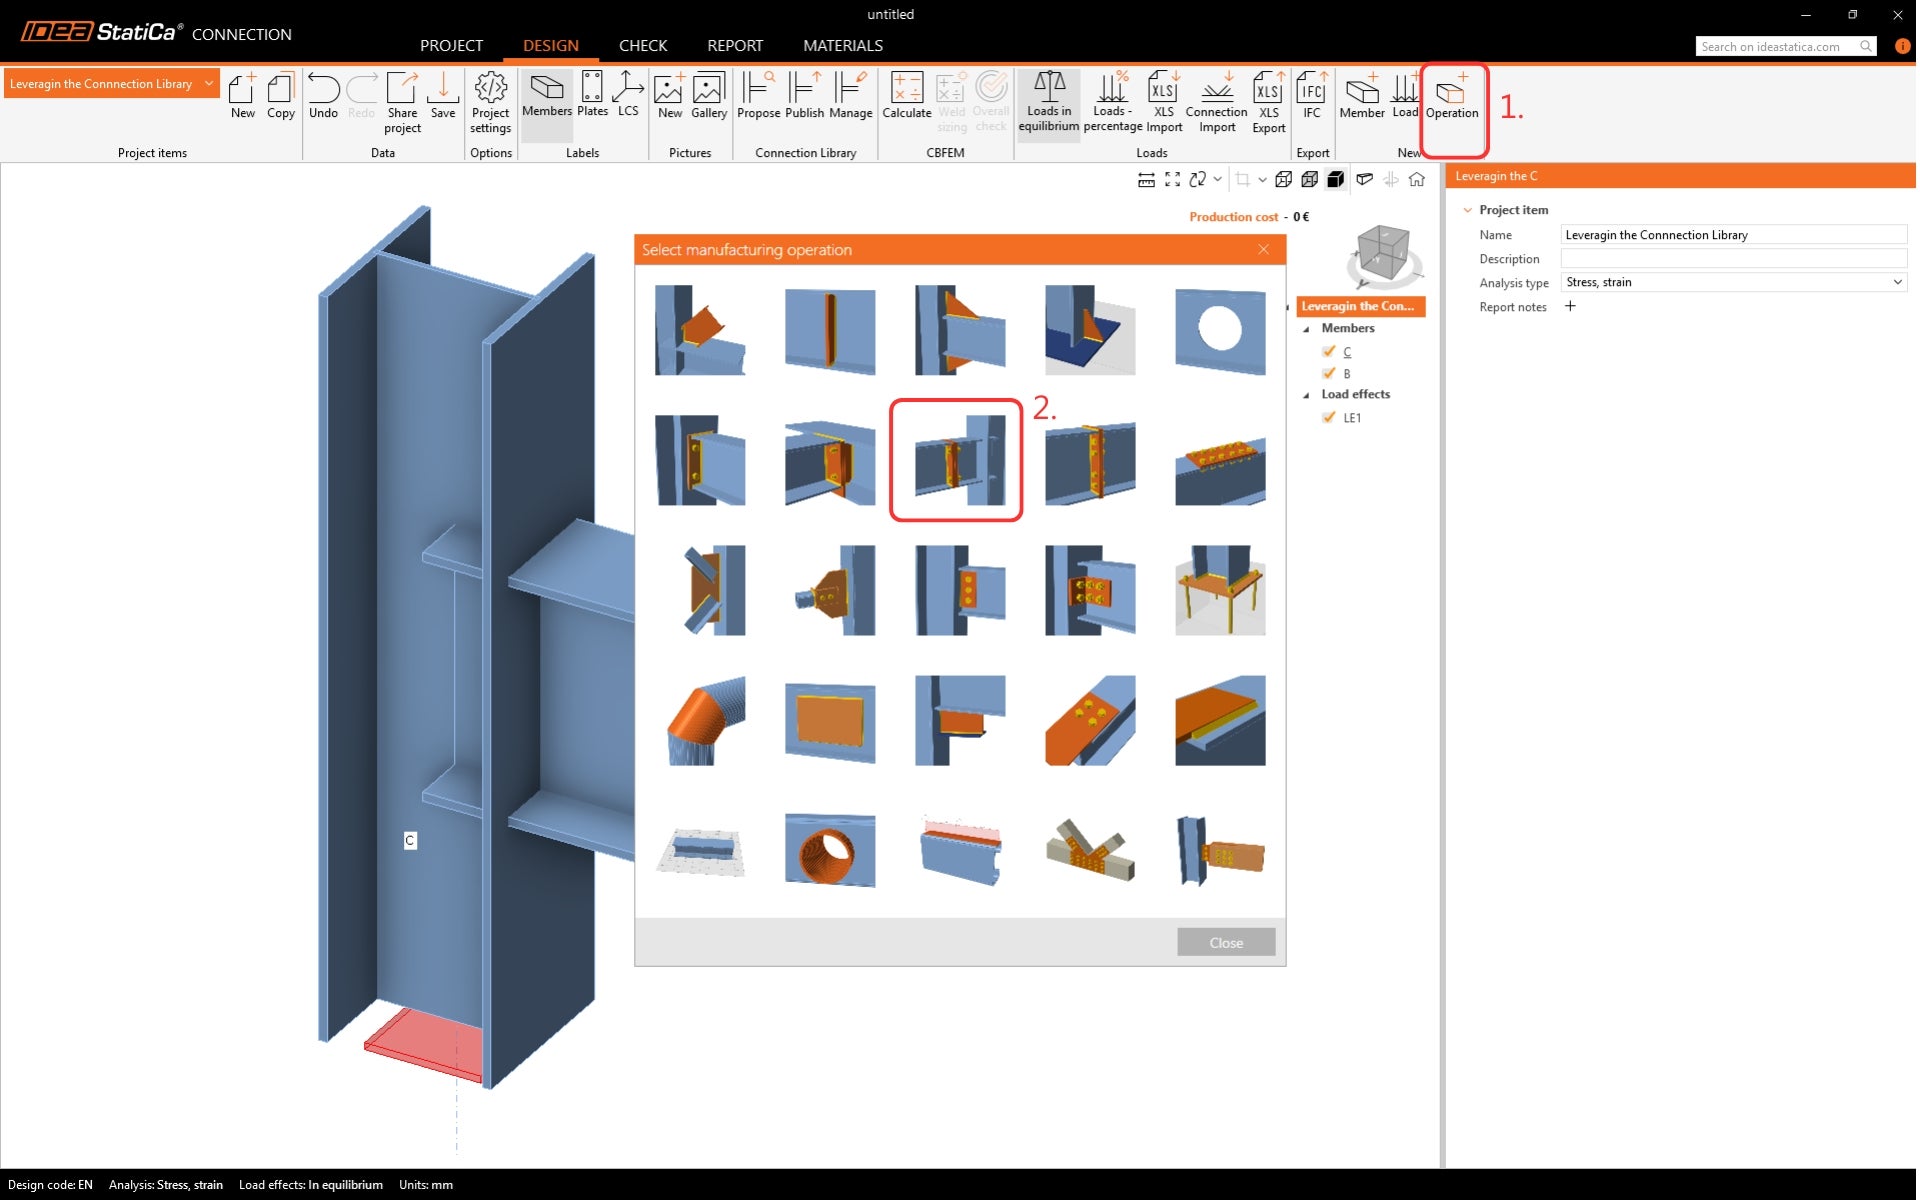
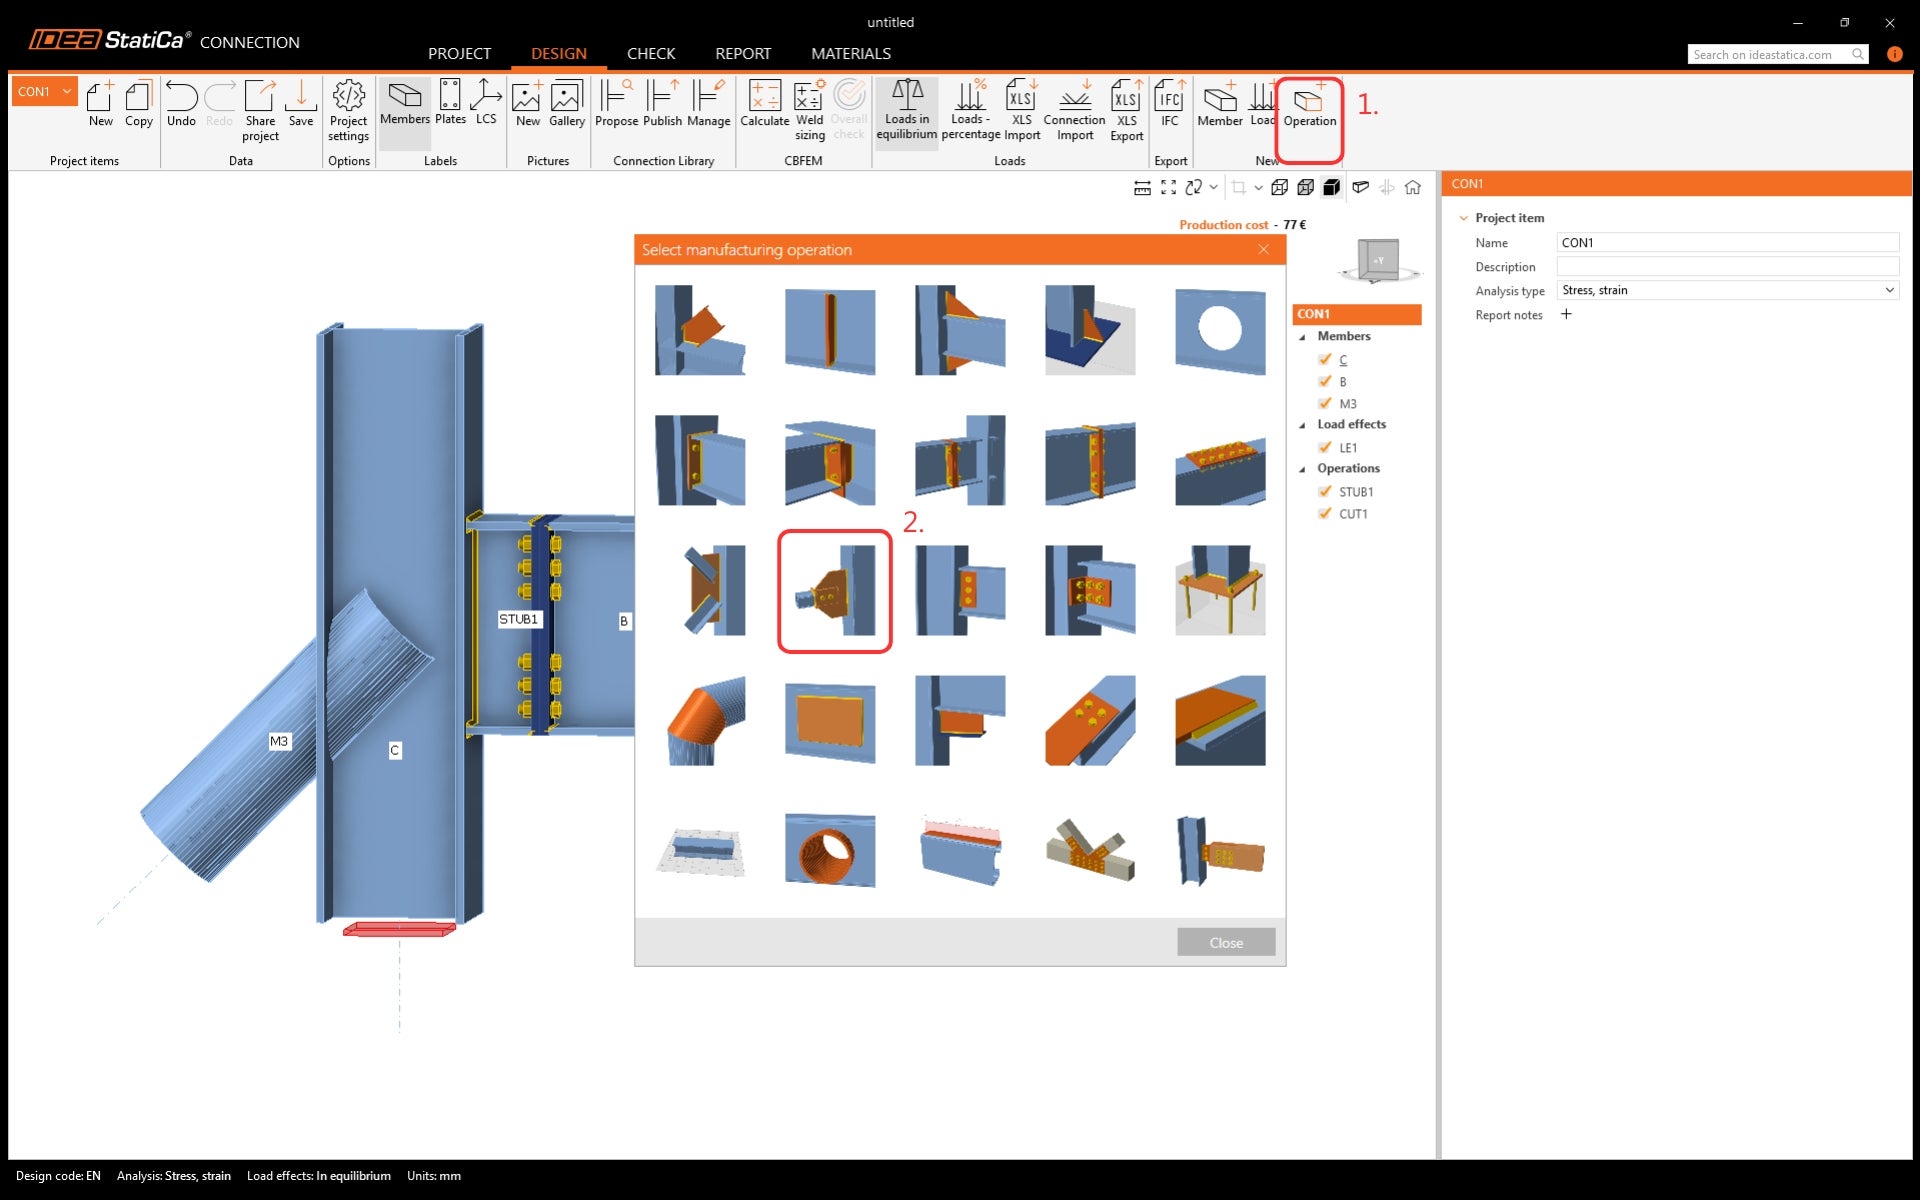
Să creăm un proiect care poate fi salvat ca șablon. Faceți clic pe Operație în Ribbon și găsiți operația de fabricație Stub - placă la placă.
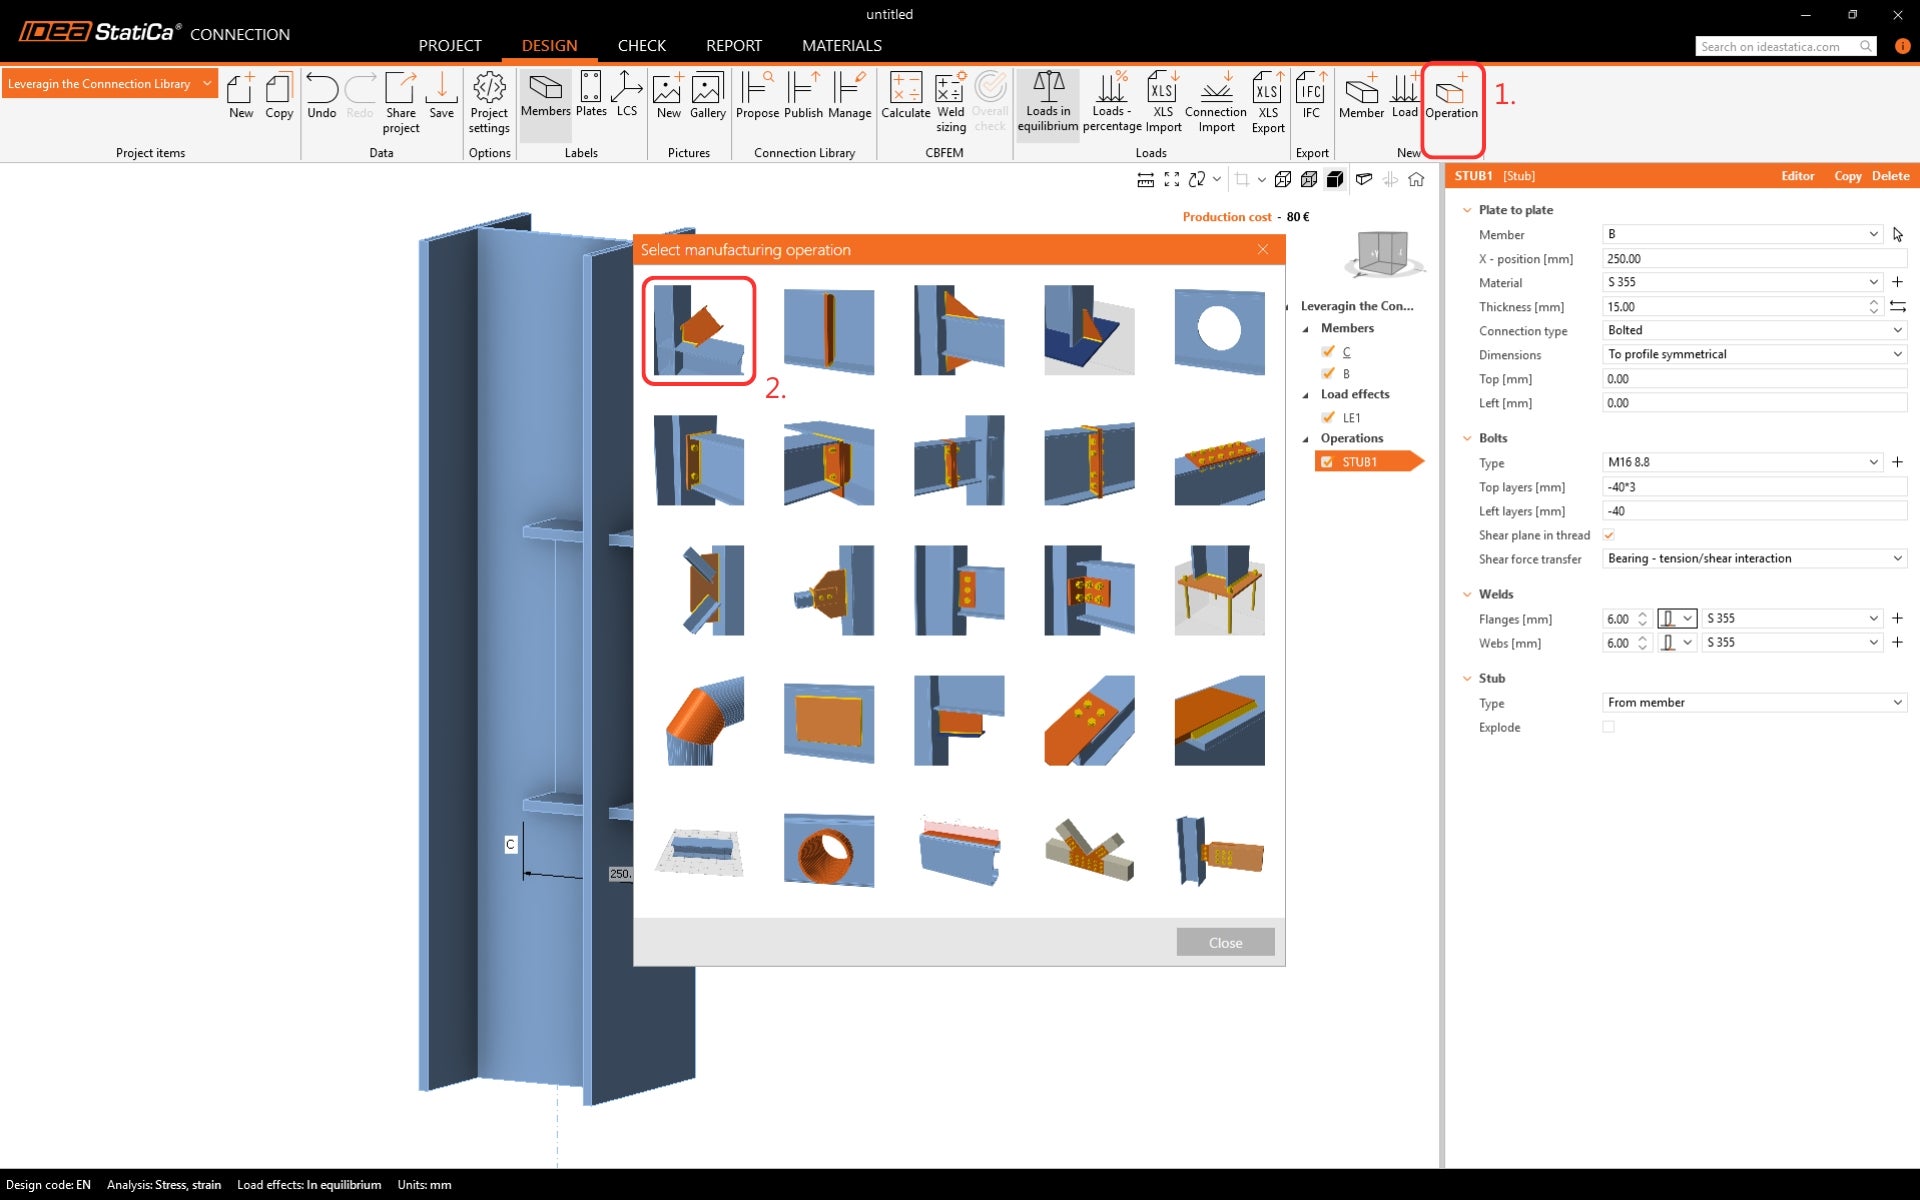
Modificați sudurile din operație. Selectați sudurile cu penetrare parțială (PJP) și editați dimensiunea.

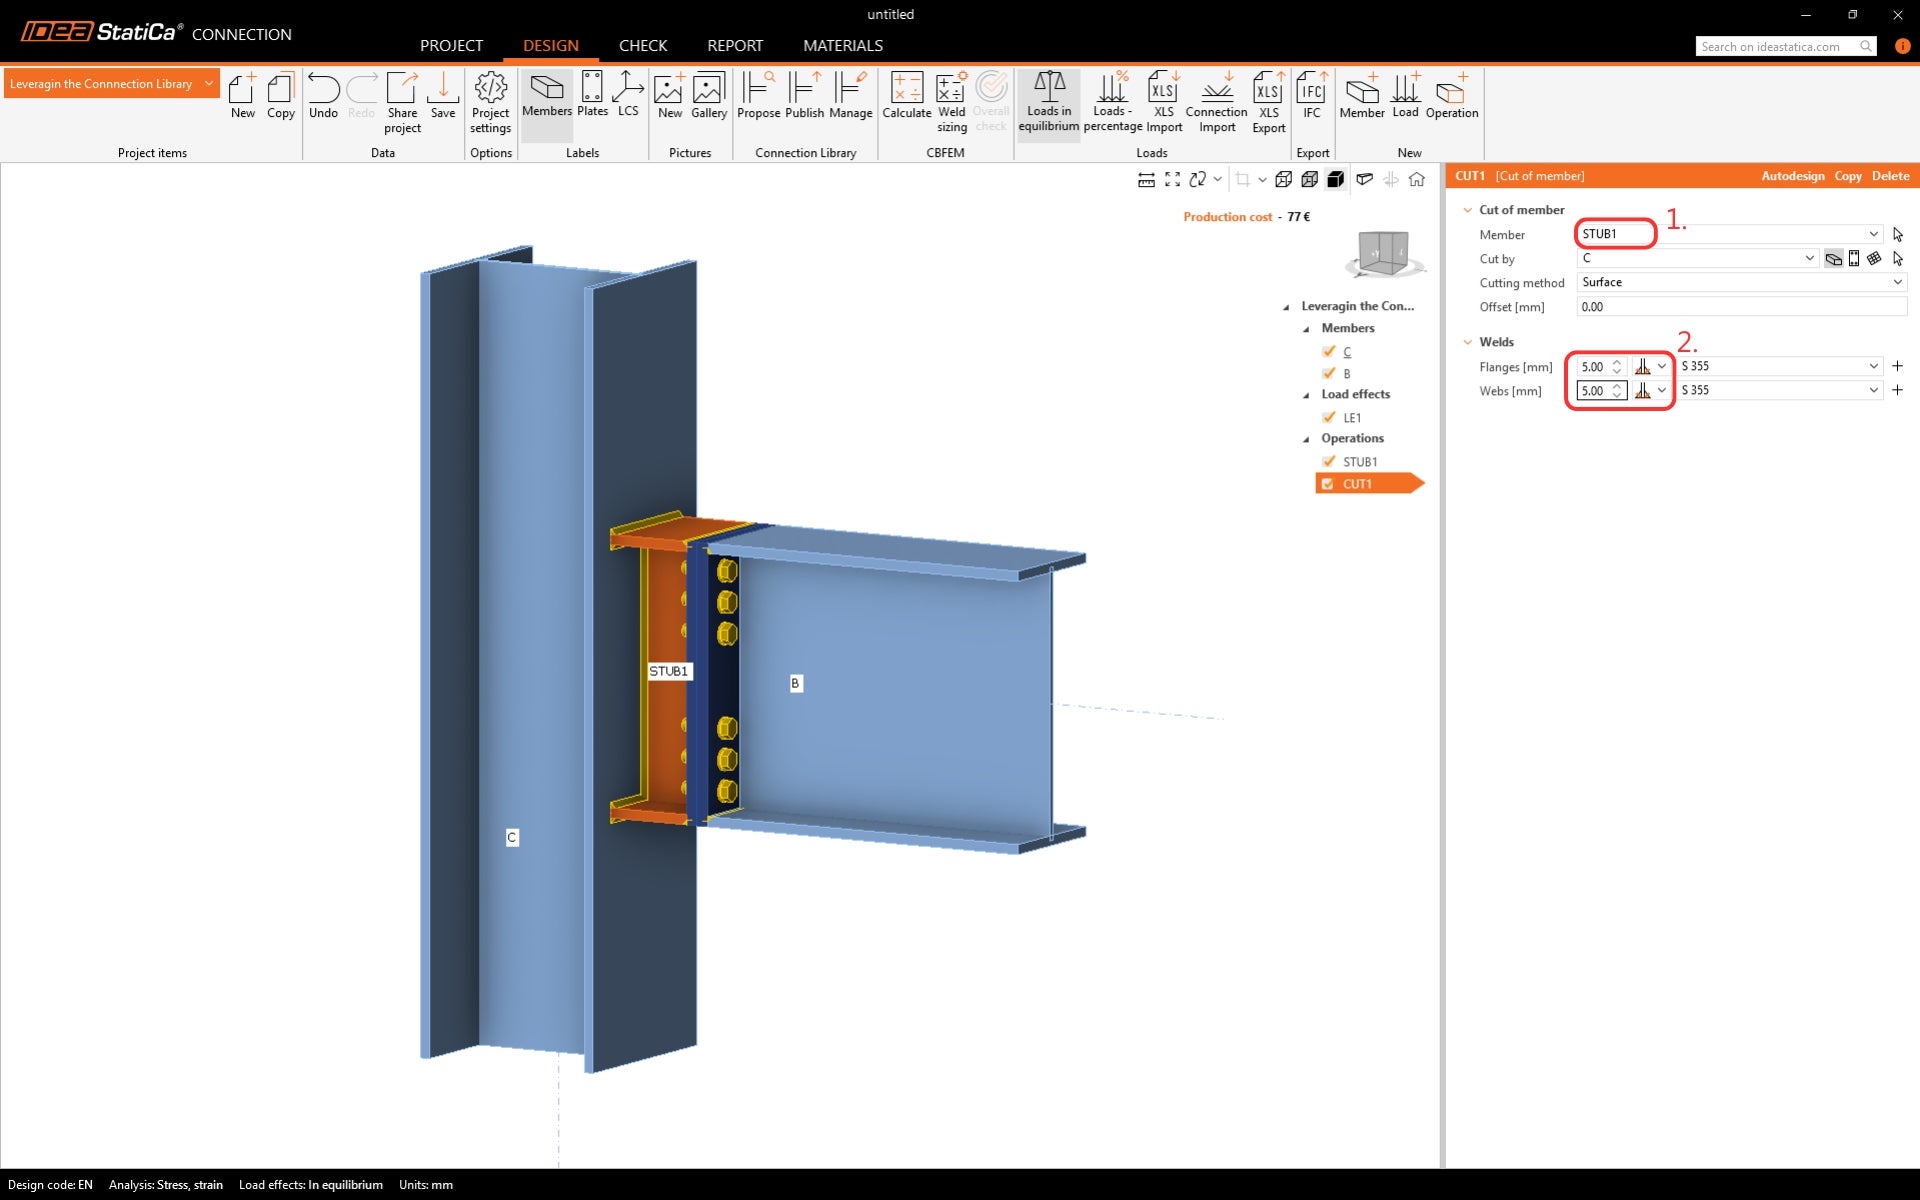
Adăugați o altă operație - Tăiere.
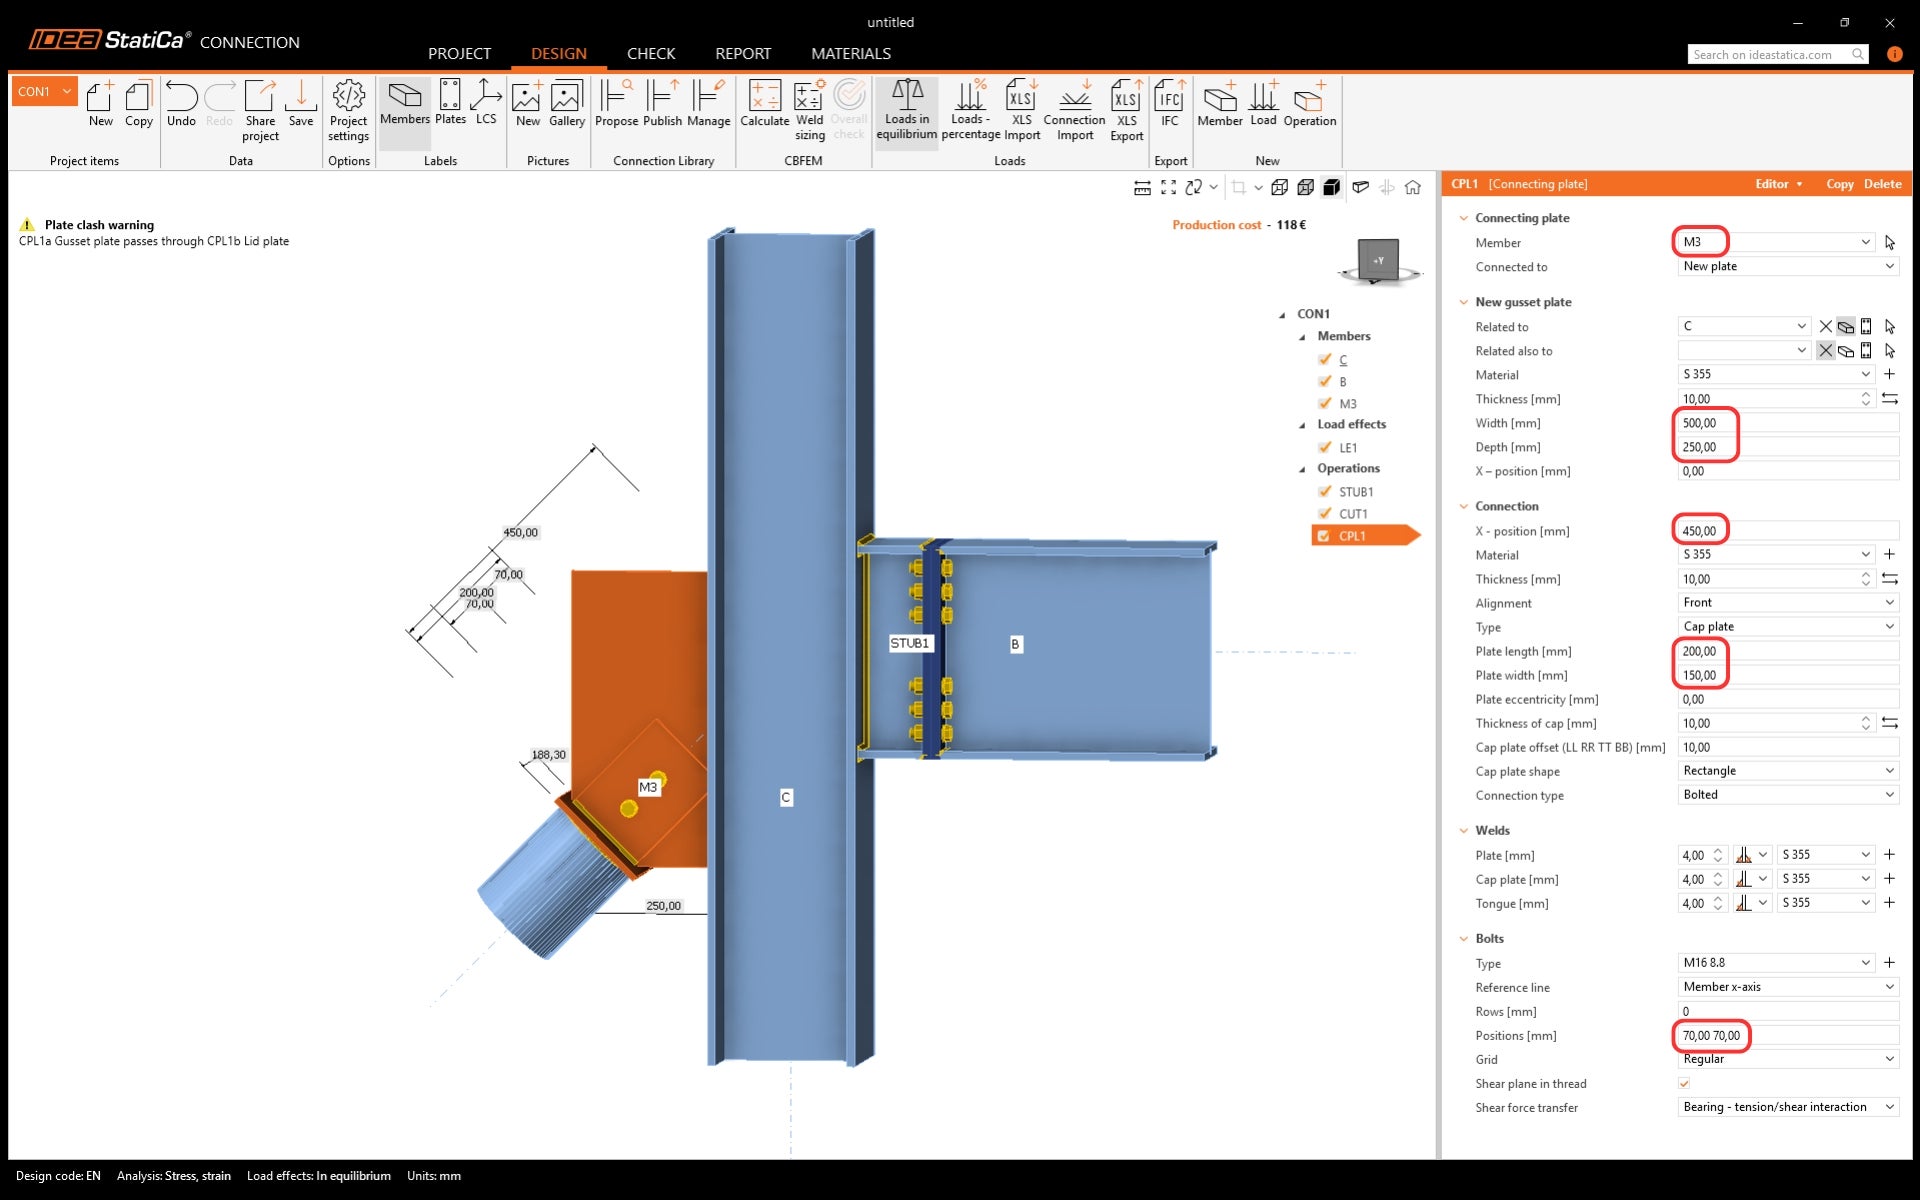
Modificați elementul care urmează să fie tăiat la STUB1 și suduri.
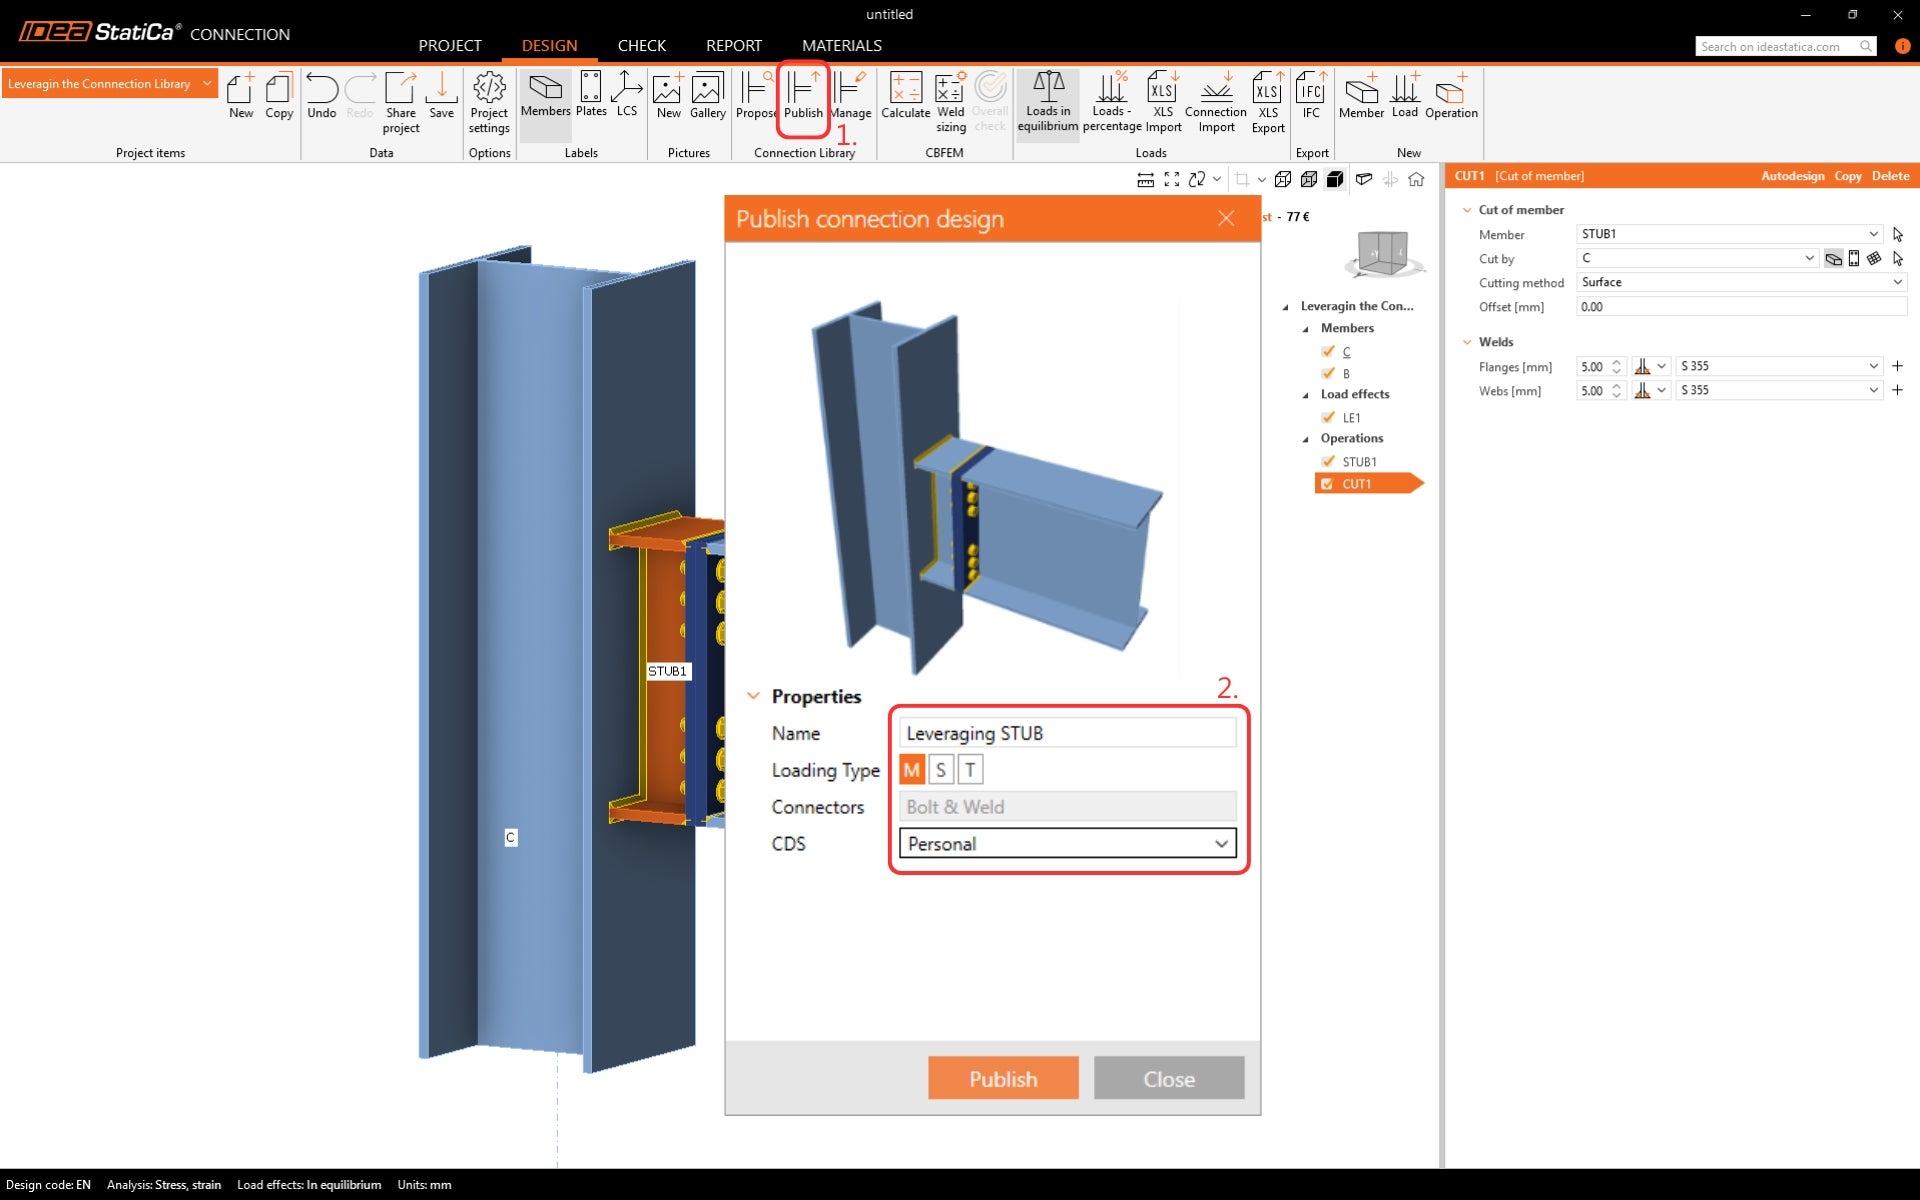
Acest proiect este utilizat frecvent; prin urmare, poate fi salvat în Connection Library. Faceți clic pe butonul Publicare din ribbon. Definiți Numele, Tipul de încărcare și Setul de proiectare a îmbinării (CDC) în care va fi stocat șablonul. Tipuri de CDC:
- Companie - fiecare utilizator cu licența companiei va putea accesa aceste elemente, în timp ce un utilizator dintr-o altă companie nu le poate vedea, utiliza sau accesa.
- Personal - disponibil doar pentru autorul proiectului.
2 Aplicarea unui șablon din Connection Library
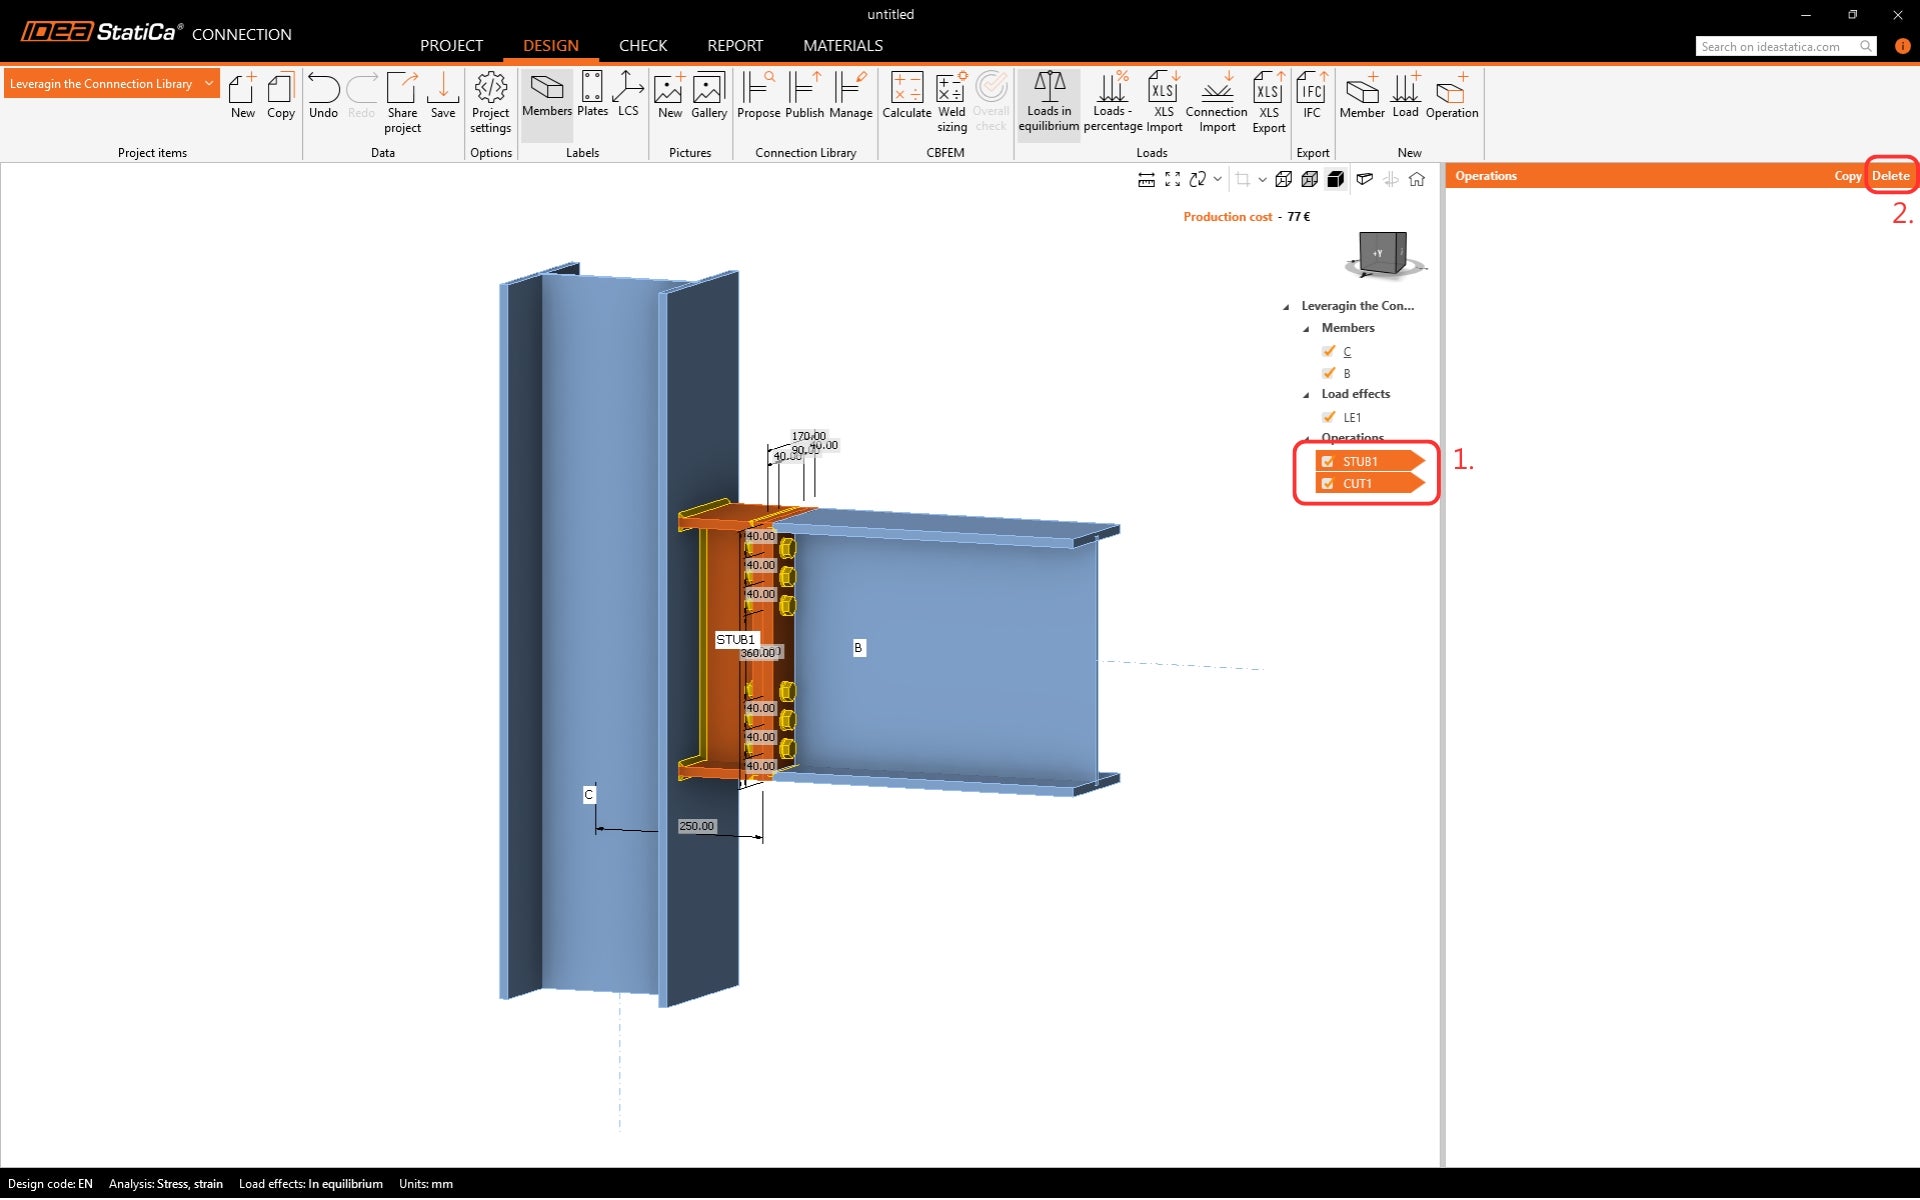
Începeți prin ștergerea operațiilor din model.
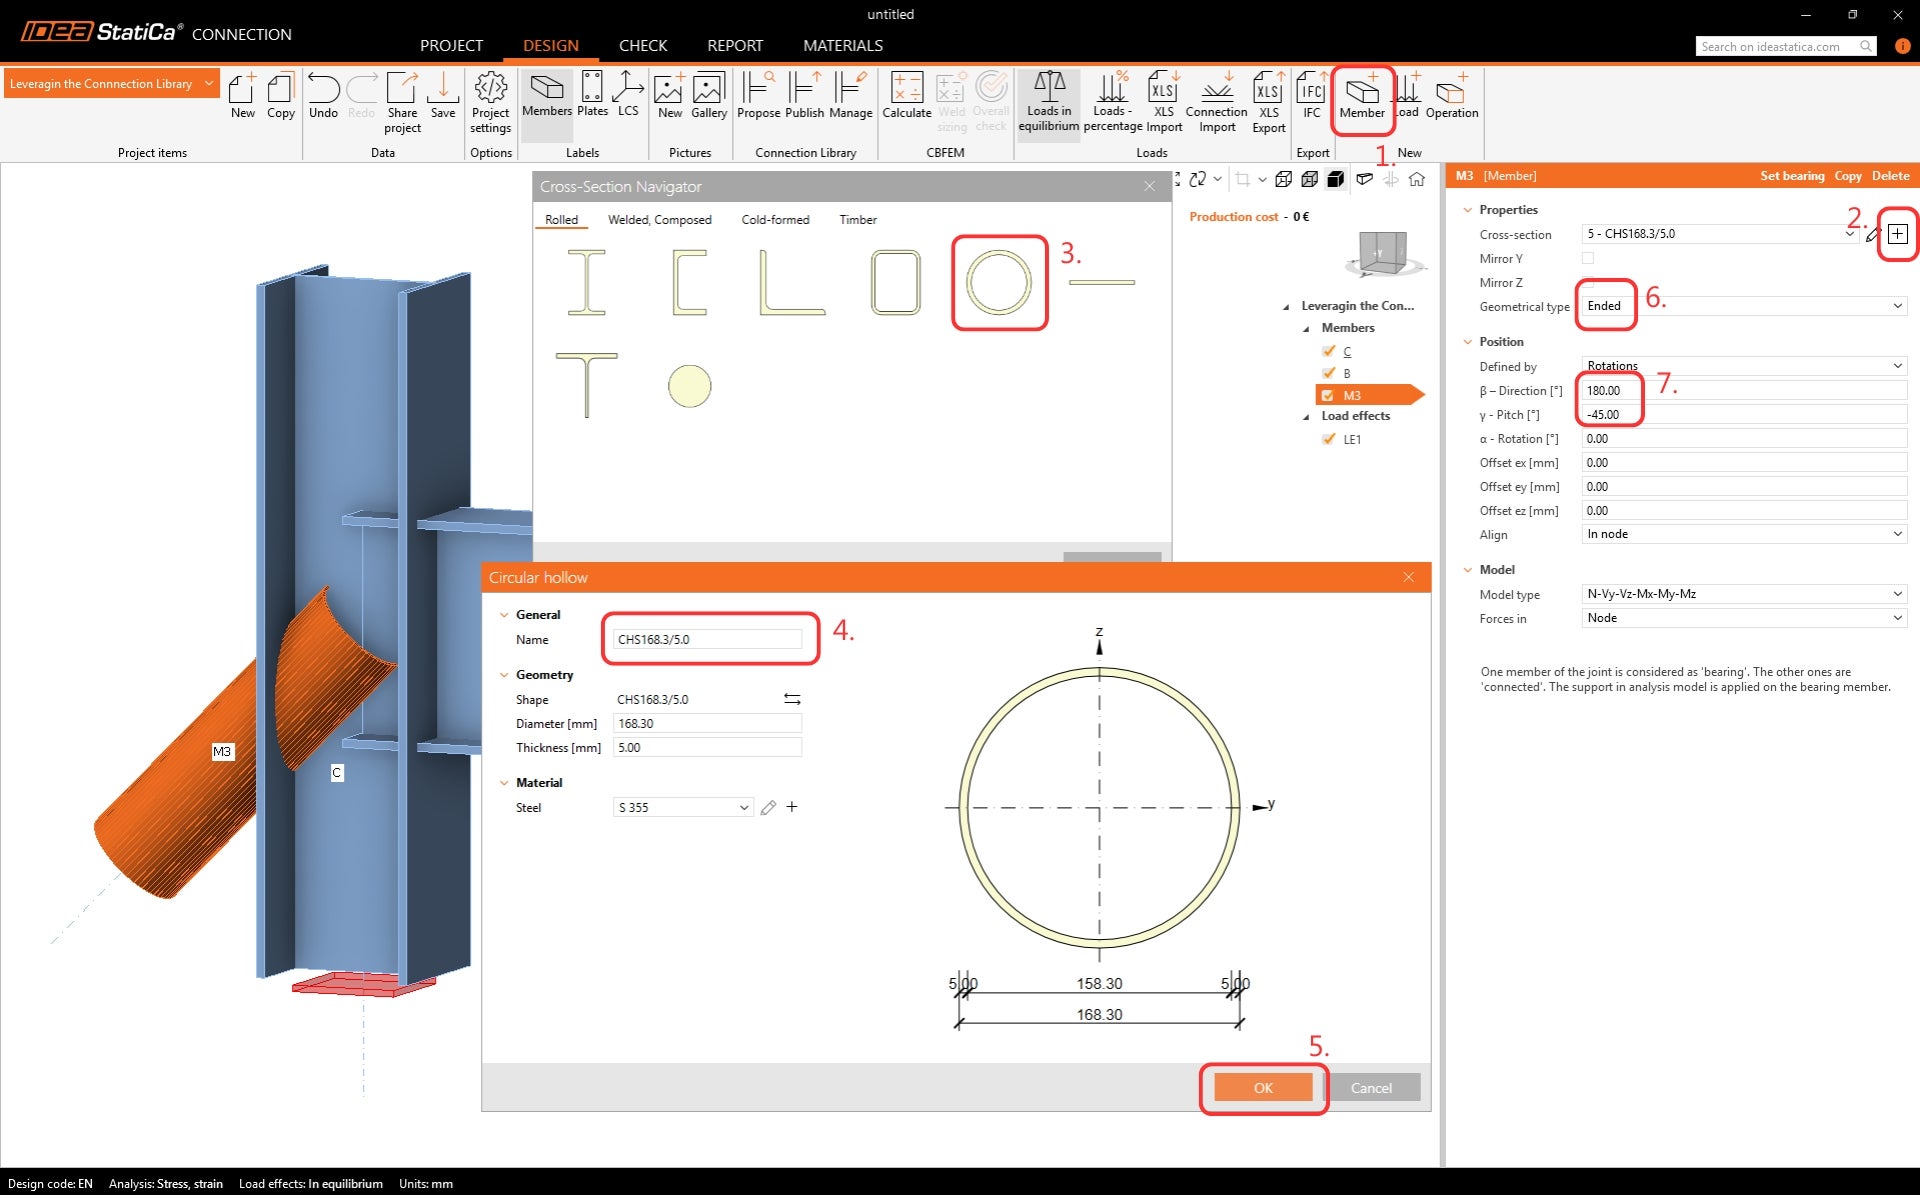
Adăugați un element suplimentar la proiect.
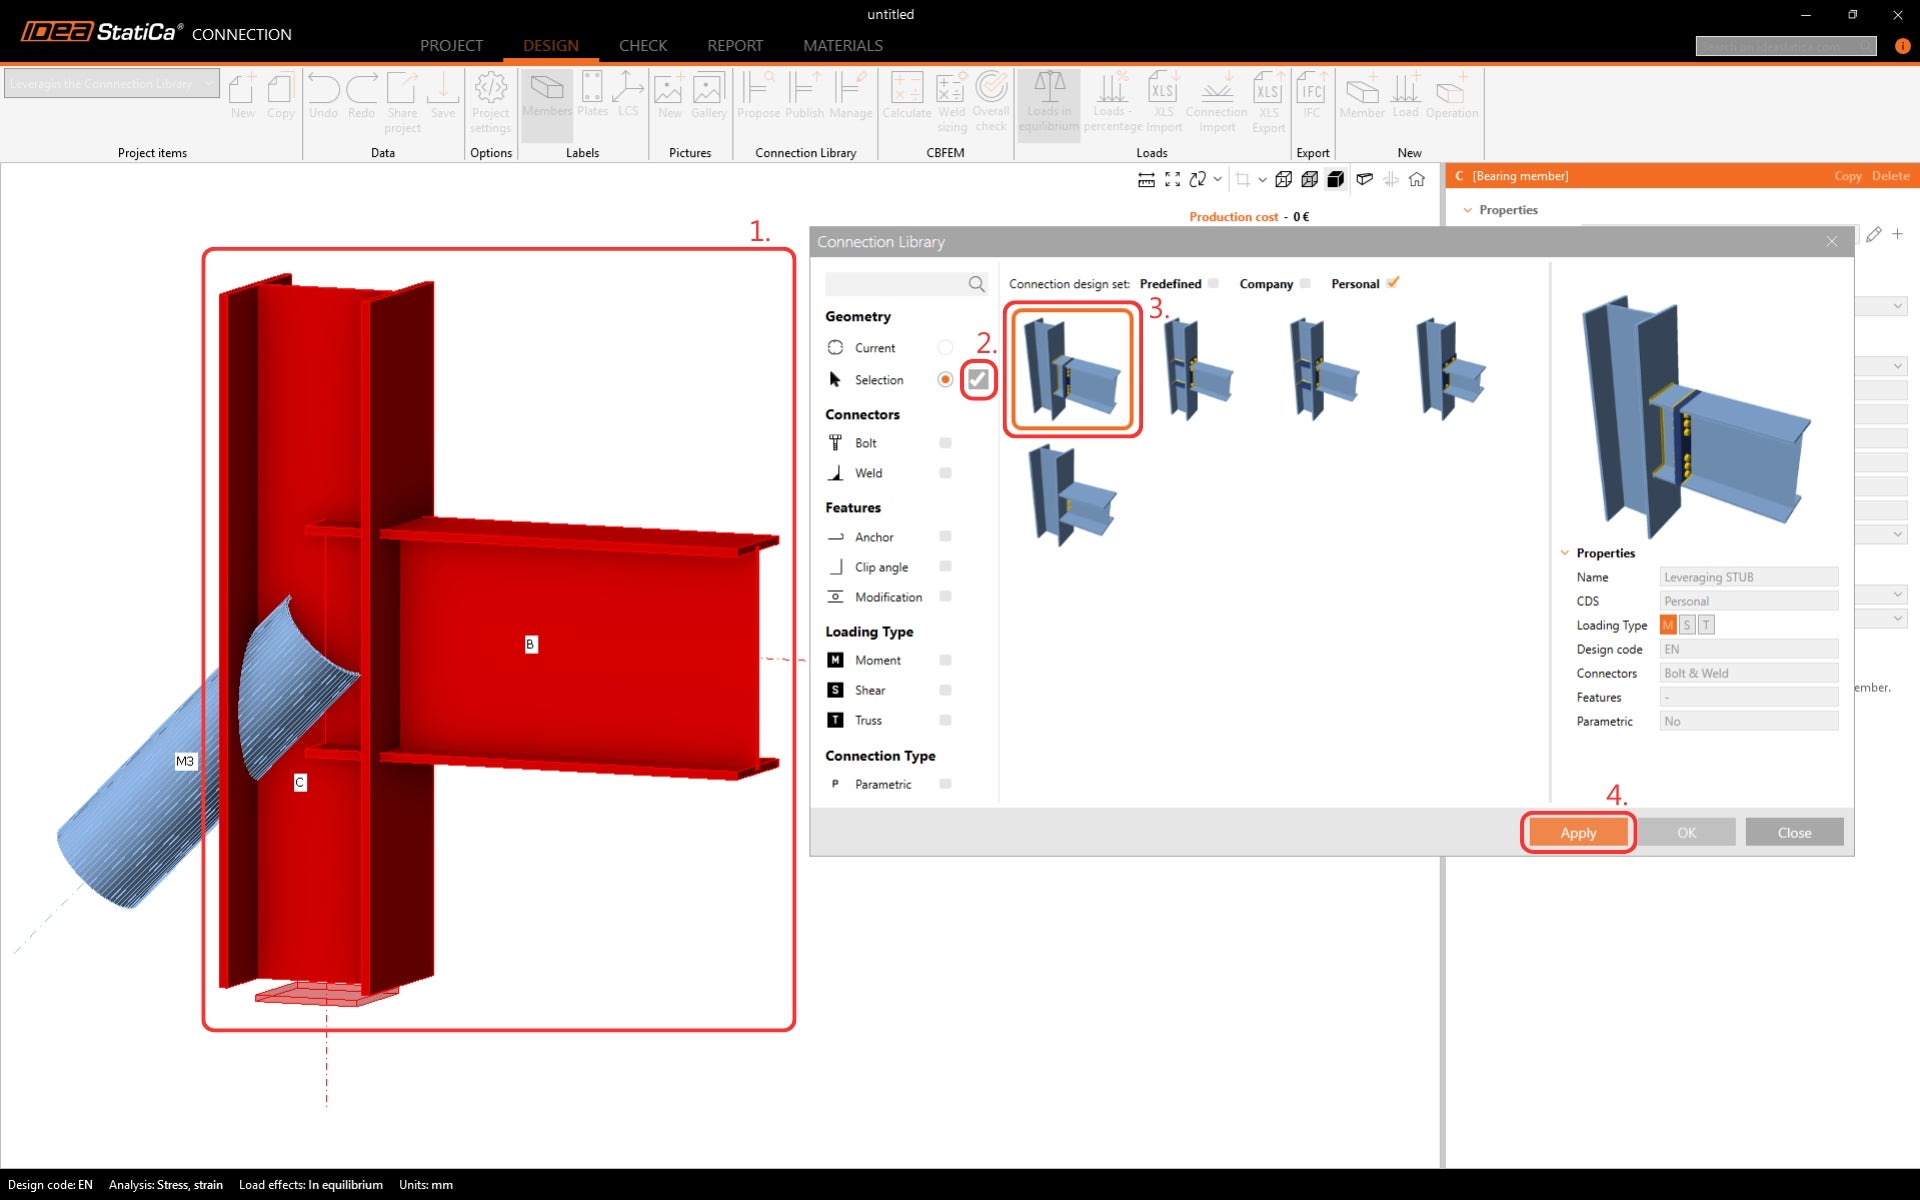
Acum, să utilizăm Connection Library în loc să folosim din nou operațiile individuale. Faceți clic pe butonul Propunere din Ribbon. Nu este disponibil niciun proiect pentru geometria curentă. Comutați la Selecție și faceți clic pe Săgeată.
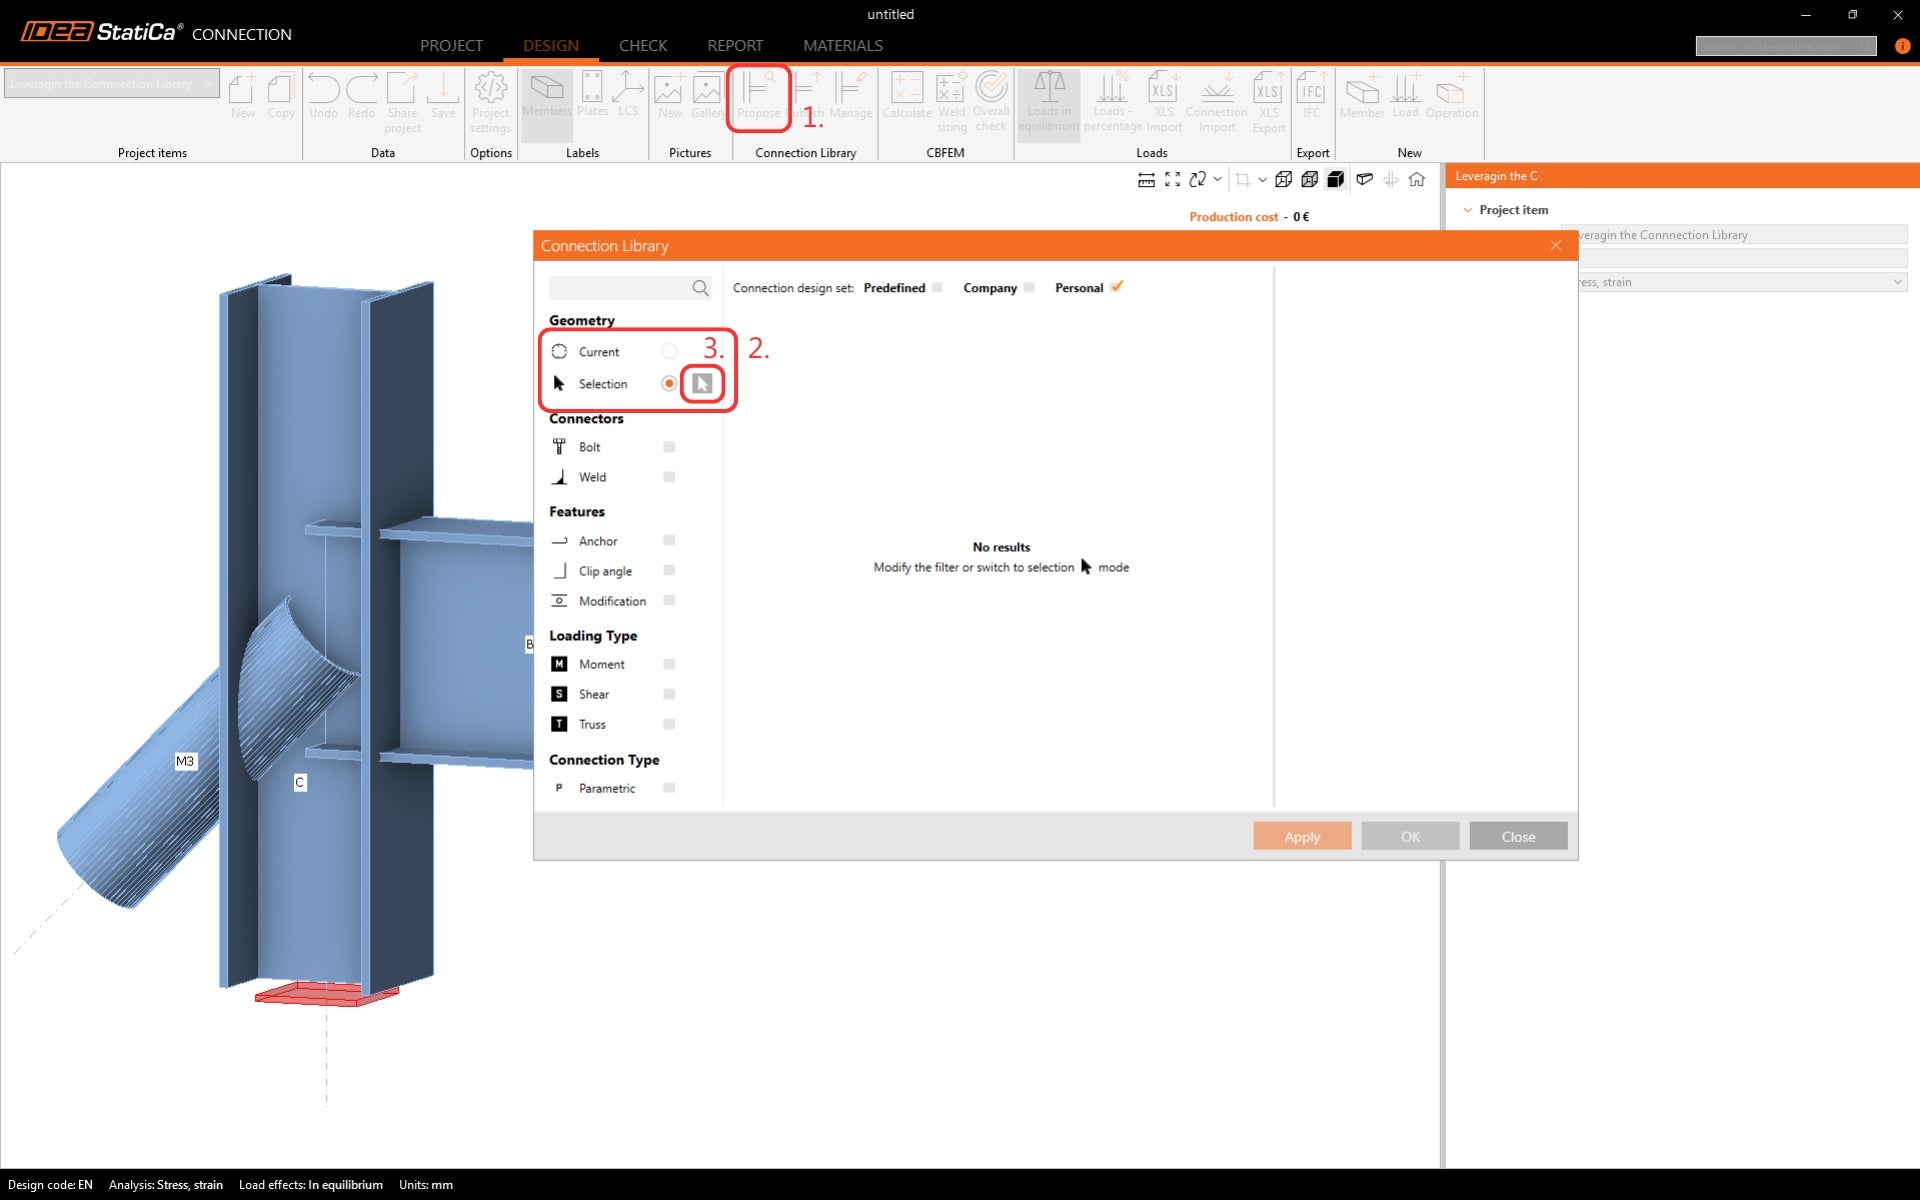
Menținând apăsat butonul Control de pe tastatură, selectați elementele B și C. Confirmați selecția făcând clic pe butonul Bifă. Șabloanele de proiectare potrivite sunt afișate pentru geometria selectată. Restrângeți selecția șabloanelor selectând doar setul de proiectare a îmbinării Personal. Aplicați șablonul.
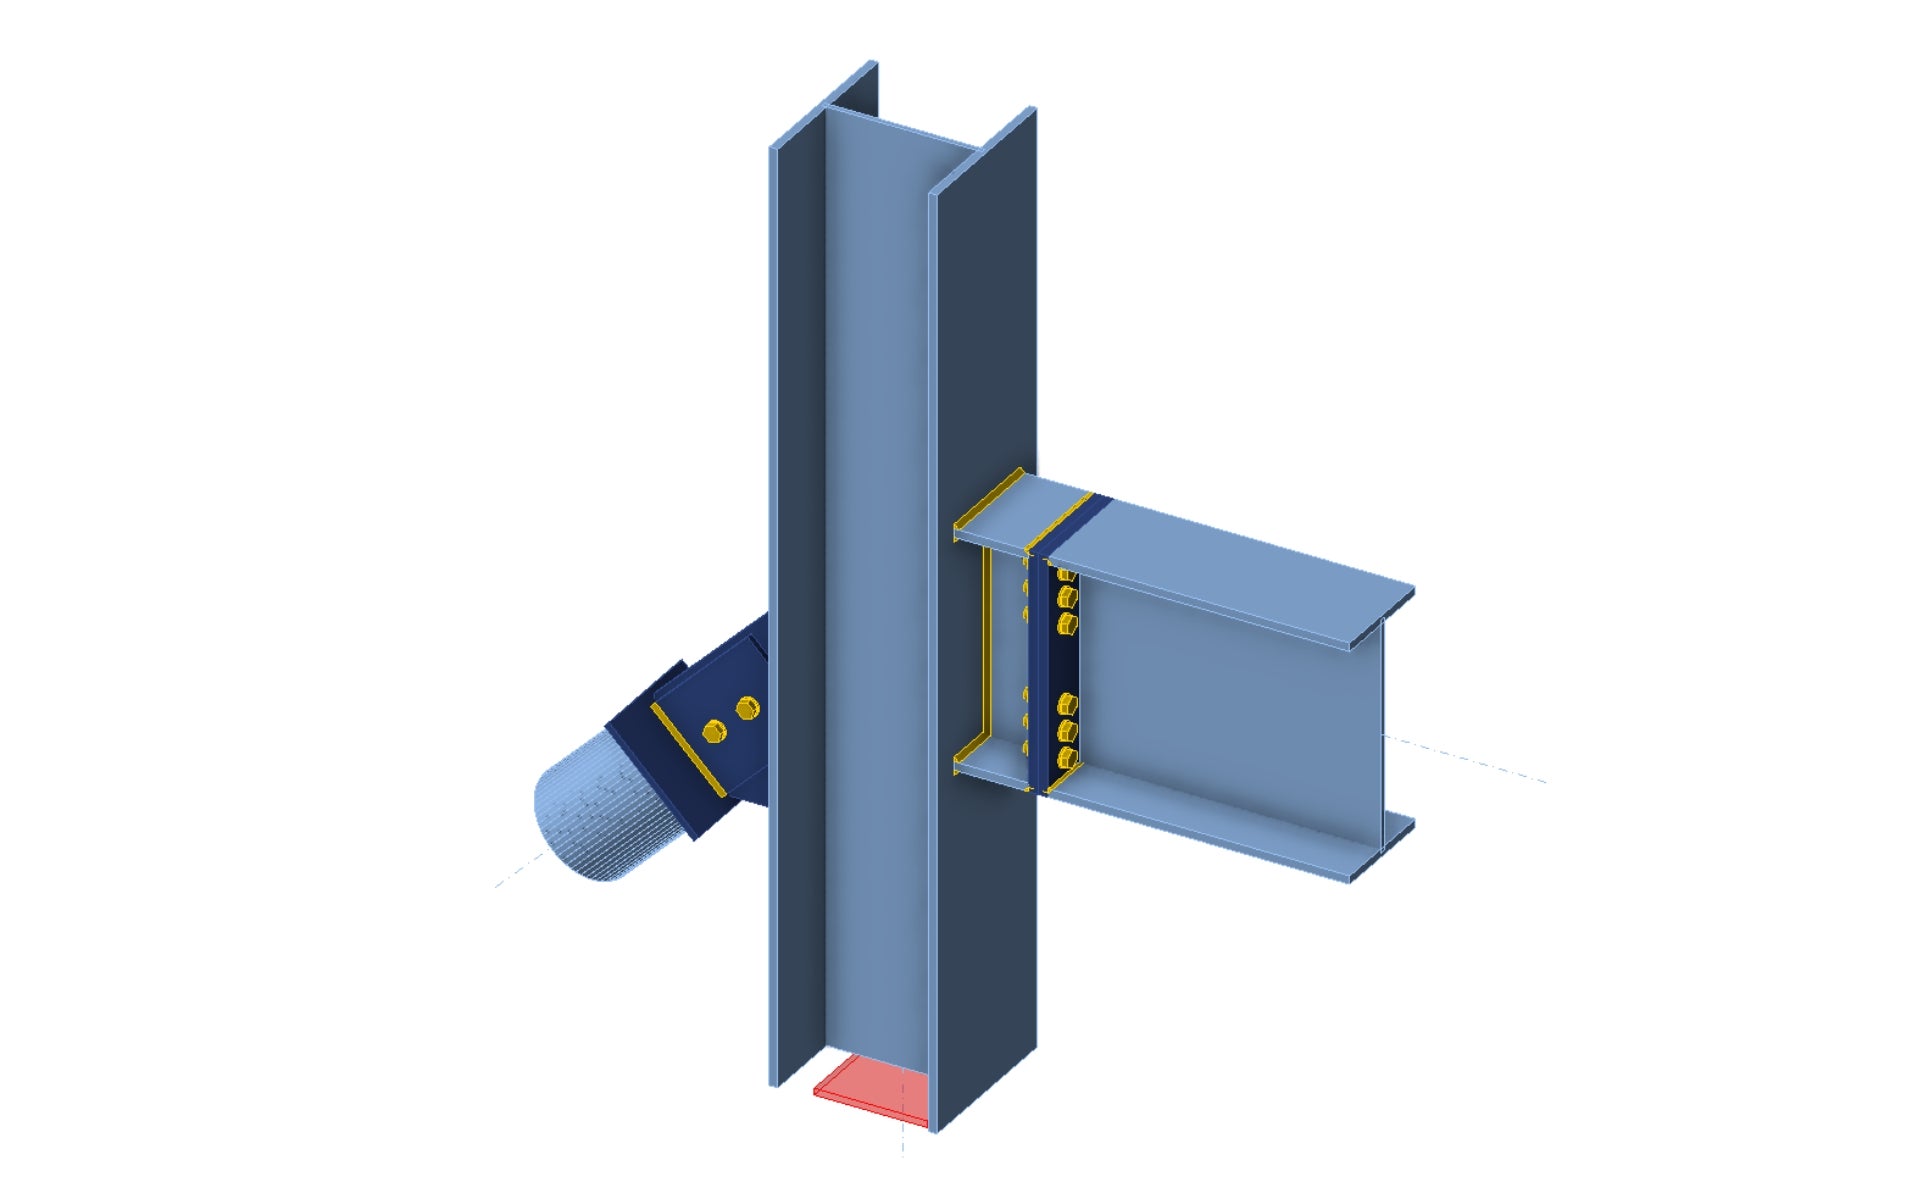
Proiectul este aplicat modelului exact așa cum a fost salvat în Connection Library. Pentru a finaliza proiectul, adăugați o operație individuală pentru elementul diagonal, deoarece acesta nu este inclus în șablon.
Modificați operația conform imaginii de mai jos.
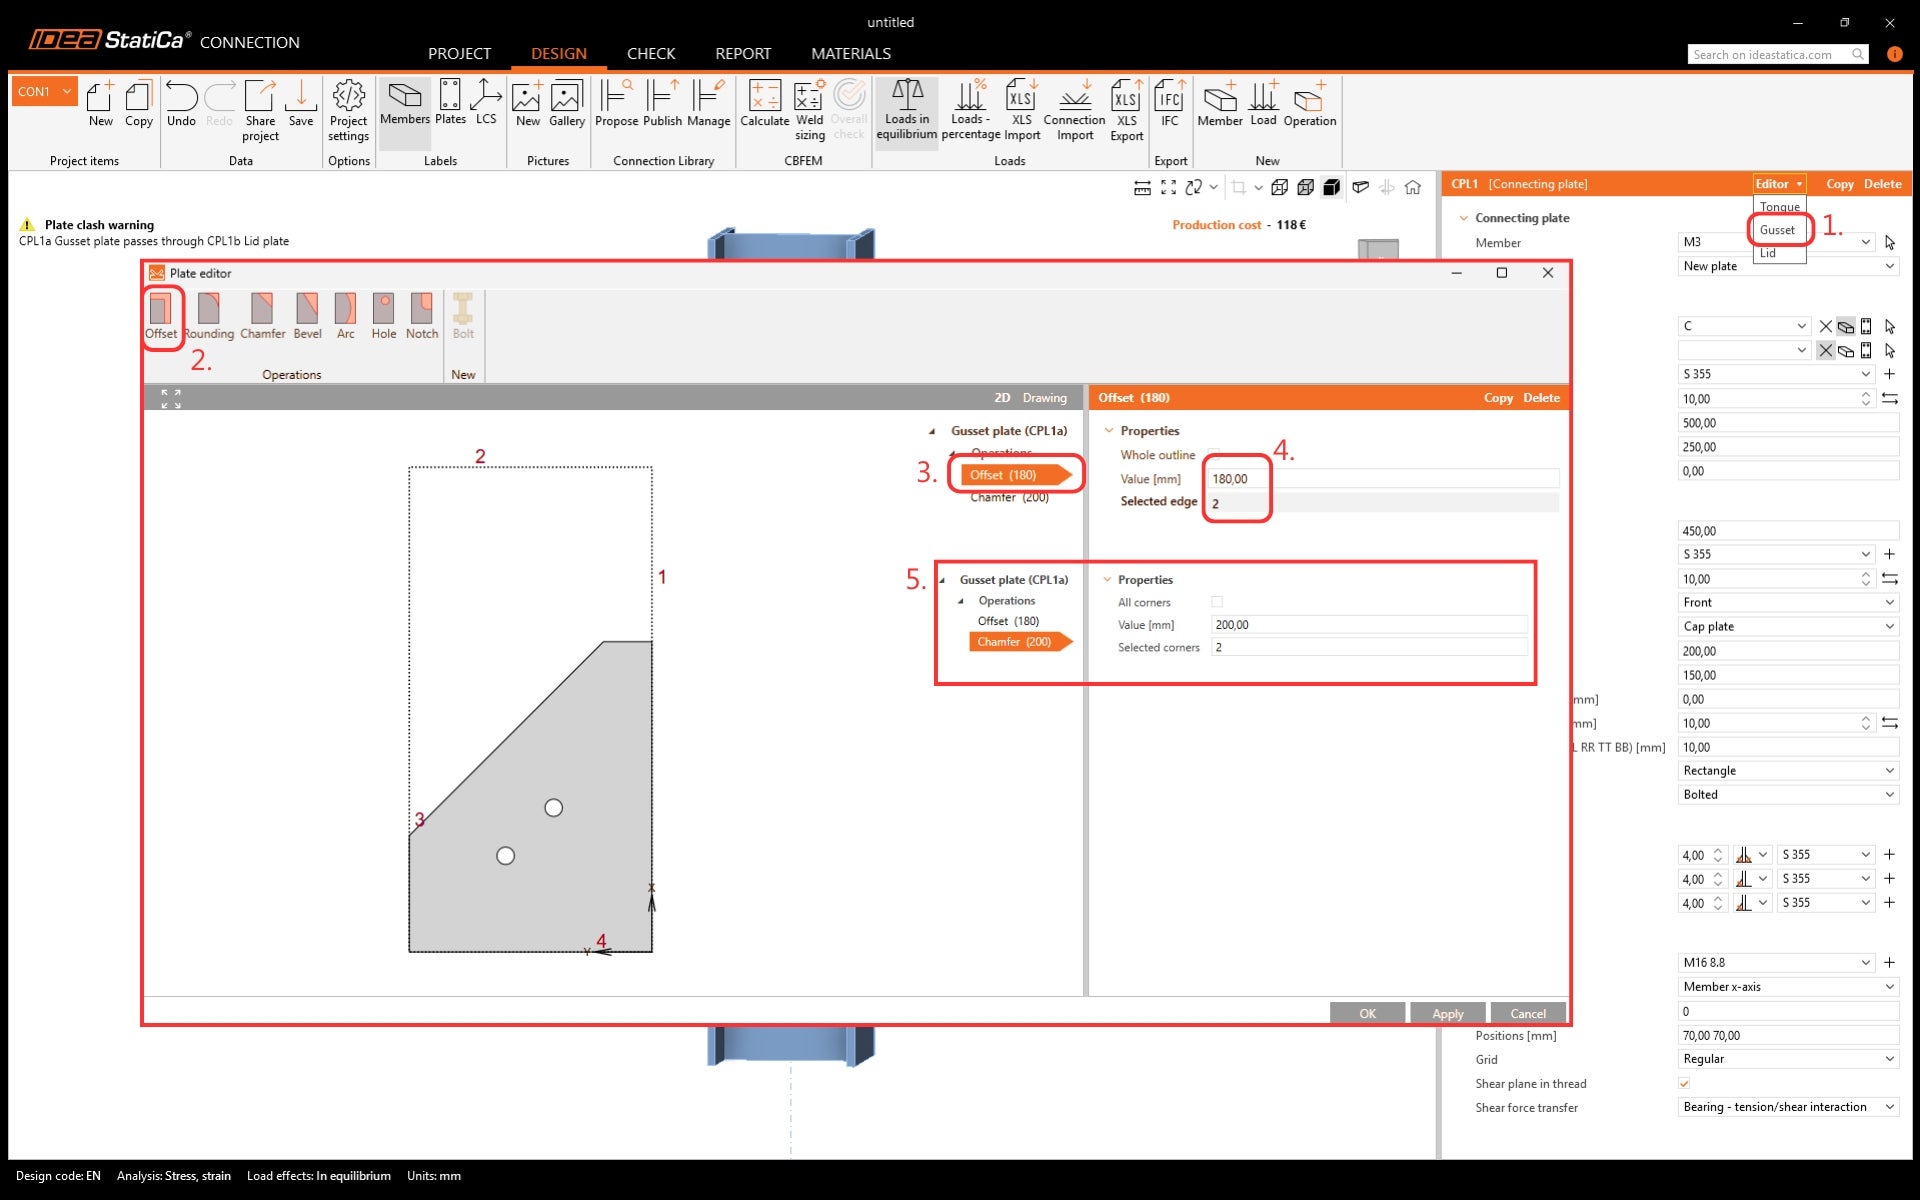
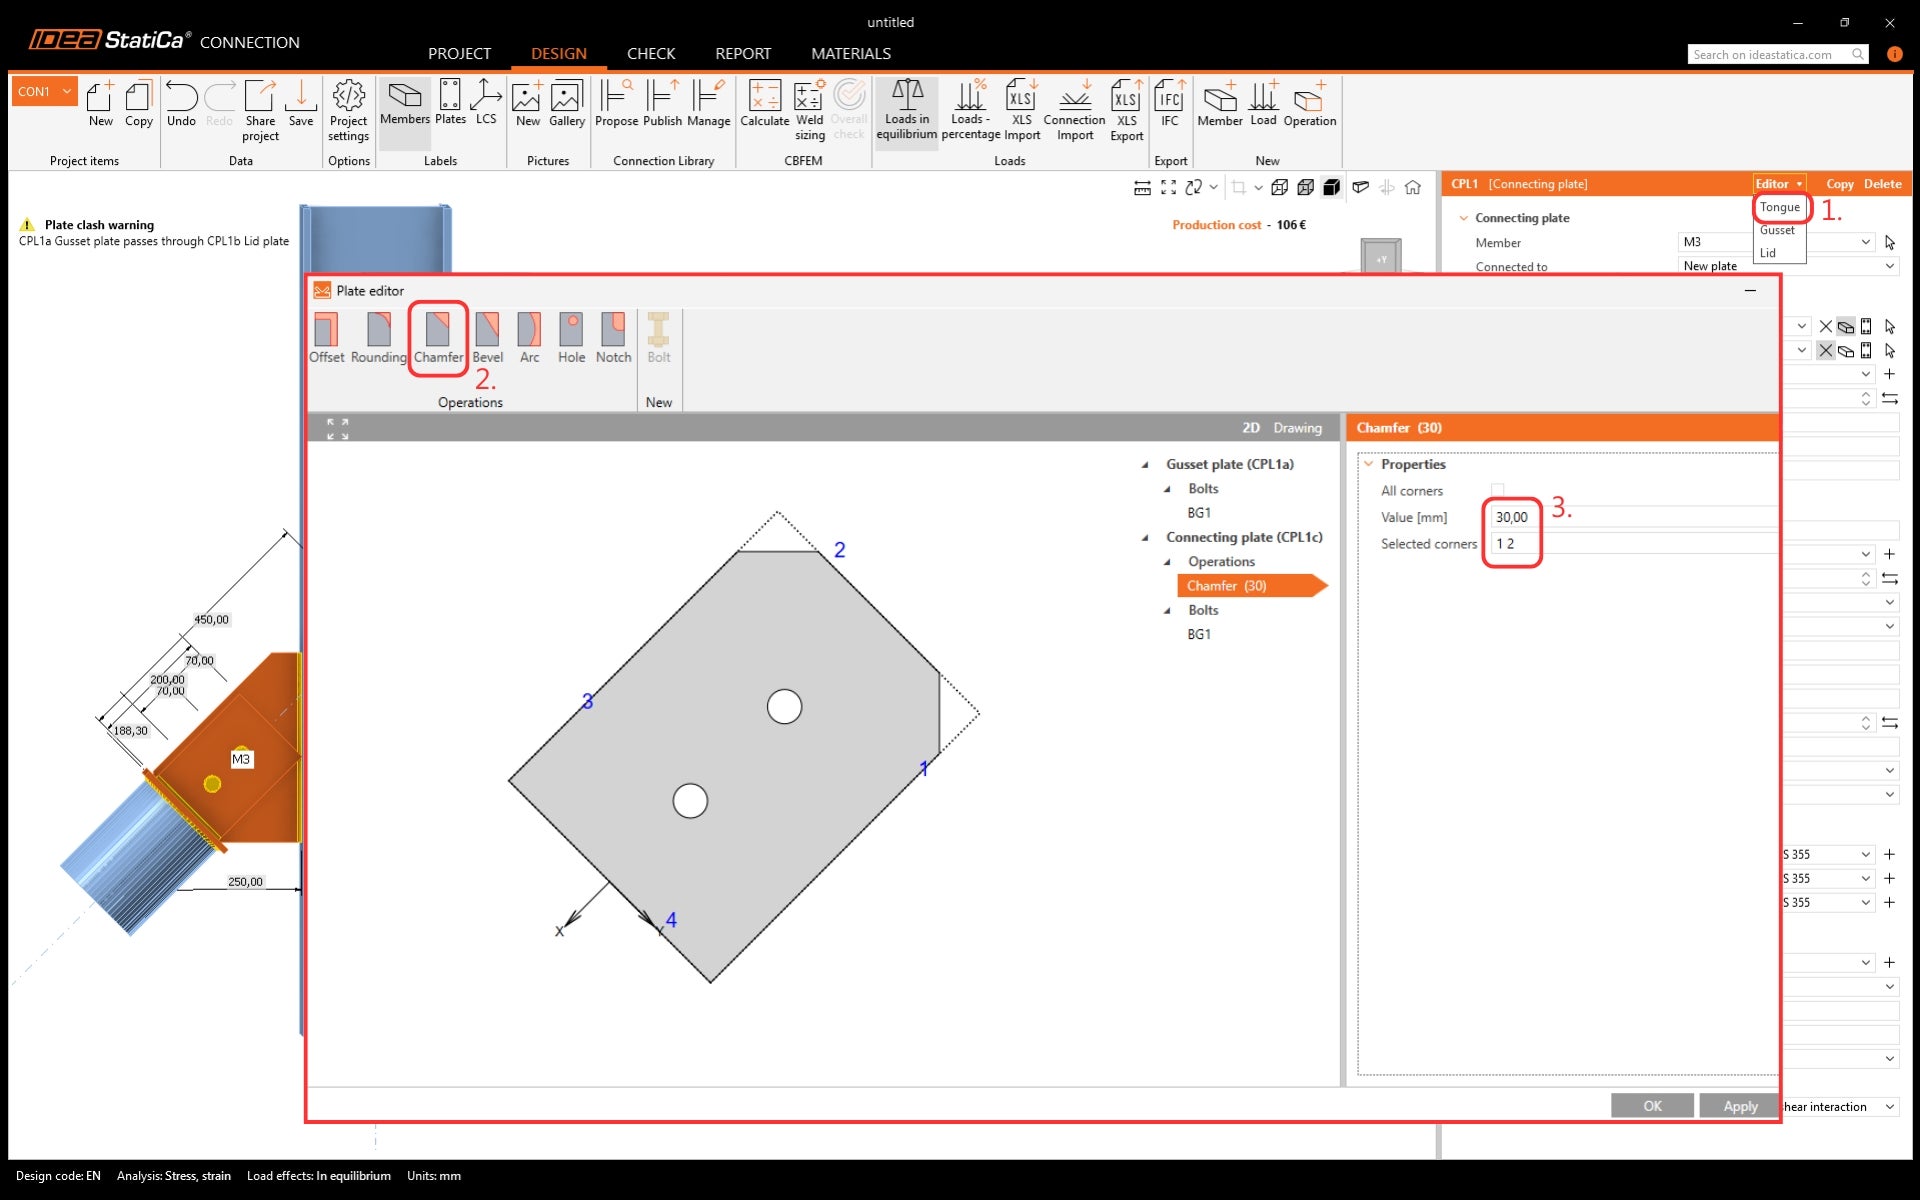
Editați placa de nod la o formă potrivită în Editorul de plăci.
Faceți același lucru pentru a tăia colțurile plăcii de limbă.
Și proiectul este finalizat. Acum poate fi publicat în Connection Library sau pur și simplu utilizat pentru a rula analiza și a obține rezultatele. Pentru aceasta, efectele de încărcare trebuie definite.
Descoperiți puterea Connection Library acum.
Citiți articolele conexe de mai jos.